
Resources
How to use placeholders in PowerPoint
Need customized slide layouts in PowerPoint? Learn how to use placeholders in PowerPoint.
You aren’t stuck with the slide layouts you see when you first create a PowerPoint presentation. If you want to set up a custom layout, position text, images, and other elements yourself, and maintain consistency throughout your presentation, you can use placeholders.
With placeholders, you can create a layout that works for you and then simply click to add the slide elements.
If you’re ready to get started, open PowerPoint and follow along to learn how to use placeholders.
About placeholders in PowerPoint
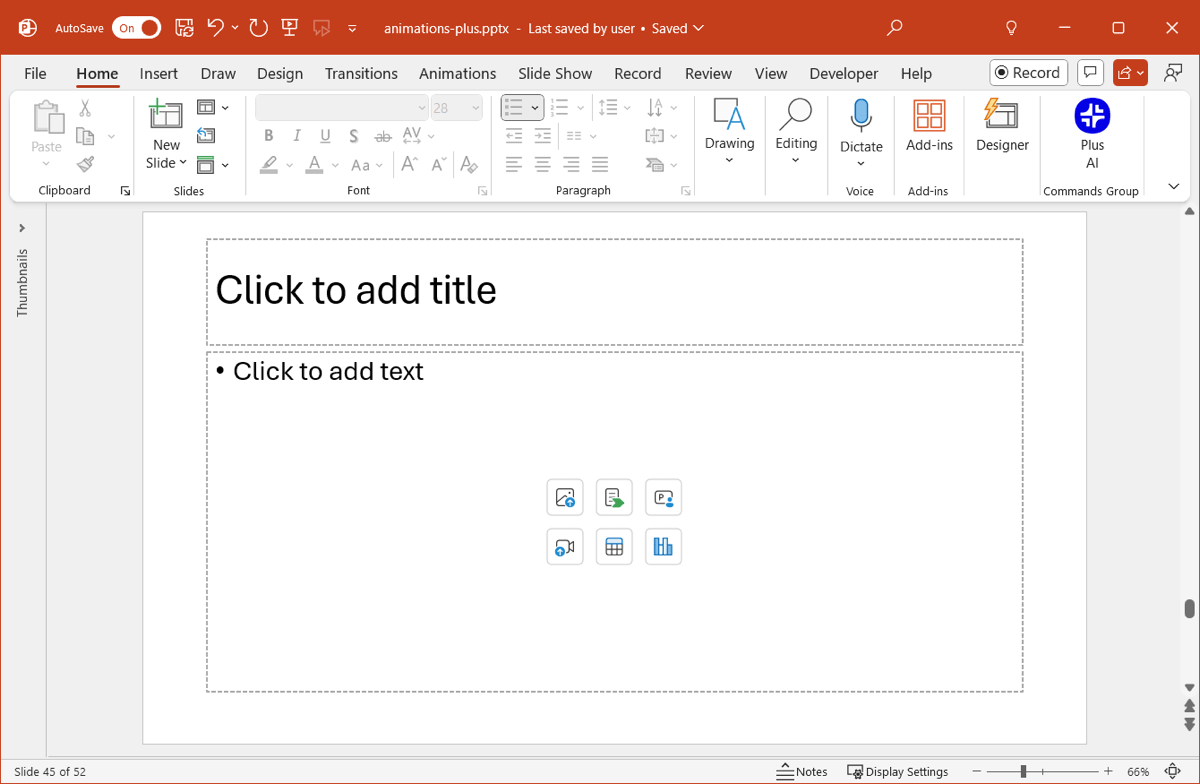
Placeholders are the “Click to add title” or “Click to add text” buttons that you see when inserting new slides in PowerPoint (except for the Blank layout.) Beyond title and text, placeholders can include boxes for the title, subtitle, images, and other content. They are conveniently pre-placed for you so that you can simply choose a layout and add your slide elements.
But if you’re creating a PowerPoint theme or template or want to set up custom slide layouts, you can add your own placeholders. This gives you an easy way to add the slide elements you need and maintain a consistent appearance and text positioning for your slides.
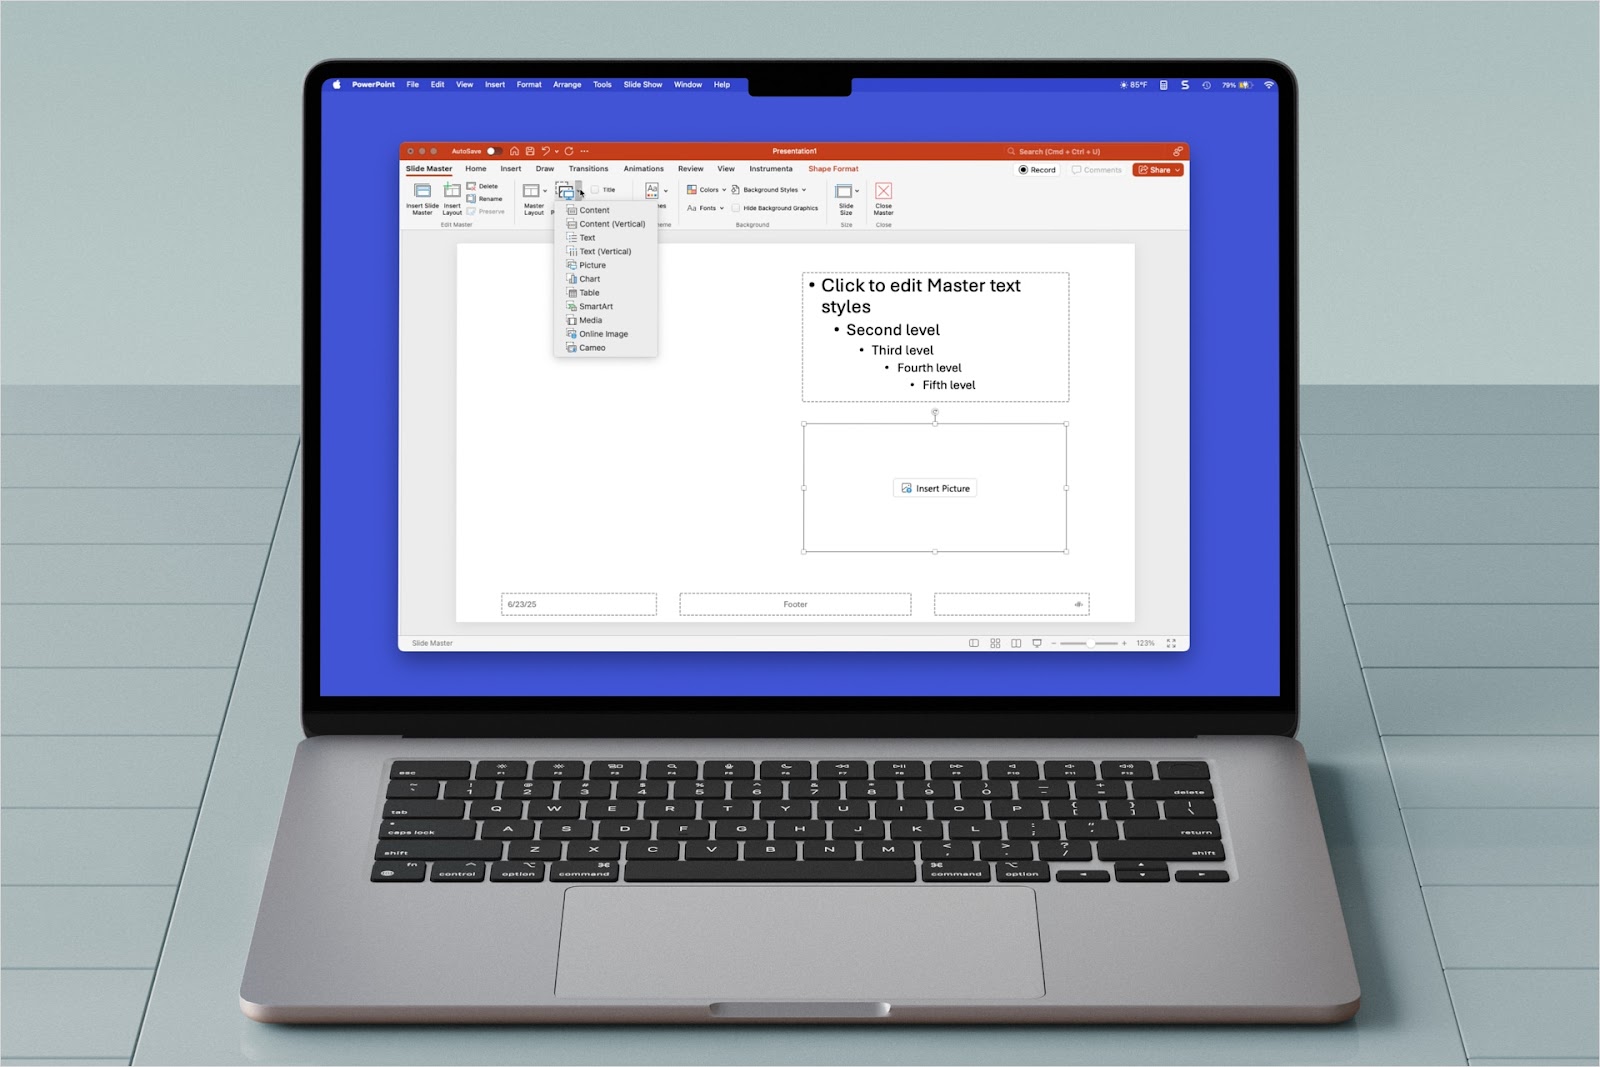
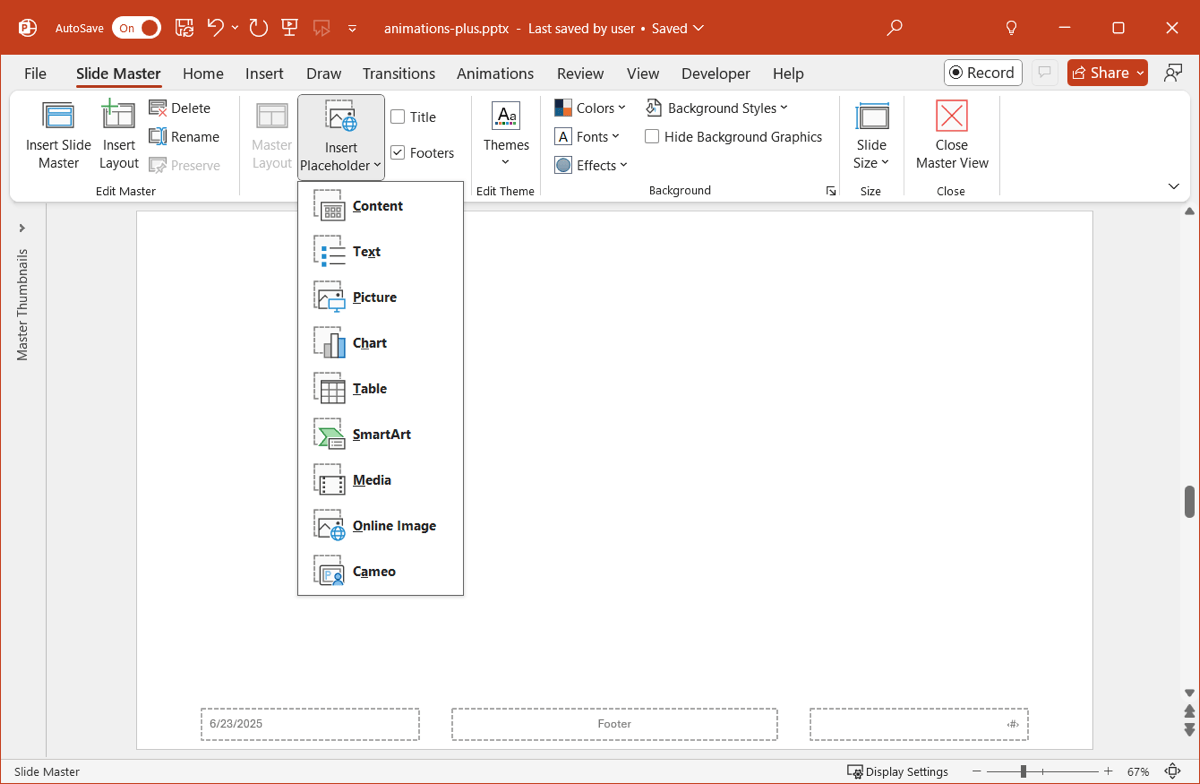
You can currently pick from nine different placeholders in PowerPoint on Windows:
- Content: Allows you to enter text or insert an element.
- Text: Provides a box formatted for text and a bullet list.
- Picture: Lets you add an image from your device, a stock picture, from an online source, or an icon.
- Chart: Allows you to insert a graph or chart.
- Table: Helps you insert a table by choosing the number of columns and rows.
- SmartArt: Lets you insert a SmartArt graphic.
- Media: Allows you to insert a video from your device.
- Online Image: Lets you add an image from your device, a stock picture, from an online source, or an icon.
- Cameo: Provides a box for you to add a live camera feed from your device.
On Mac, you have the same options as above with two additional placeholders for Content (Vertical) and Text (Vertical).
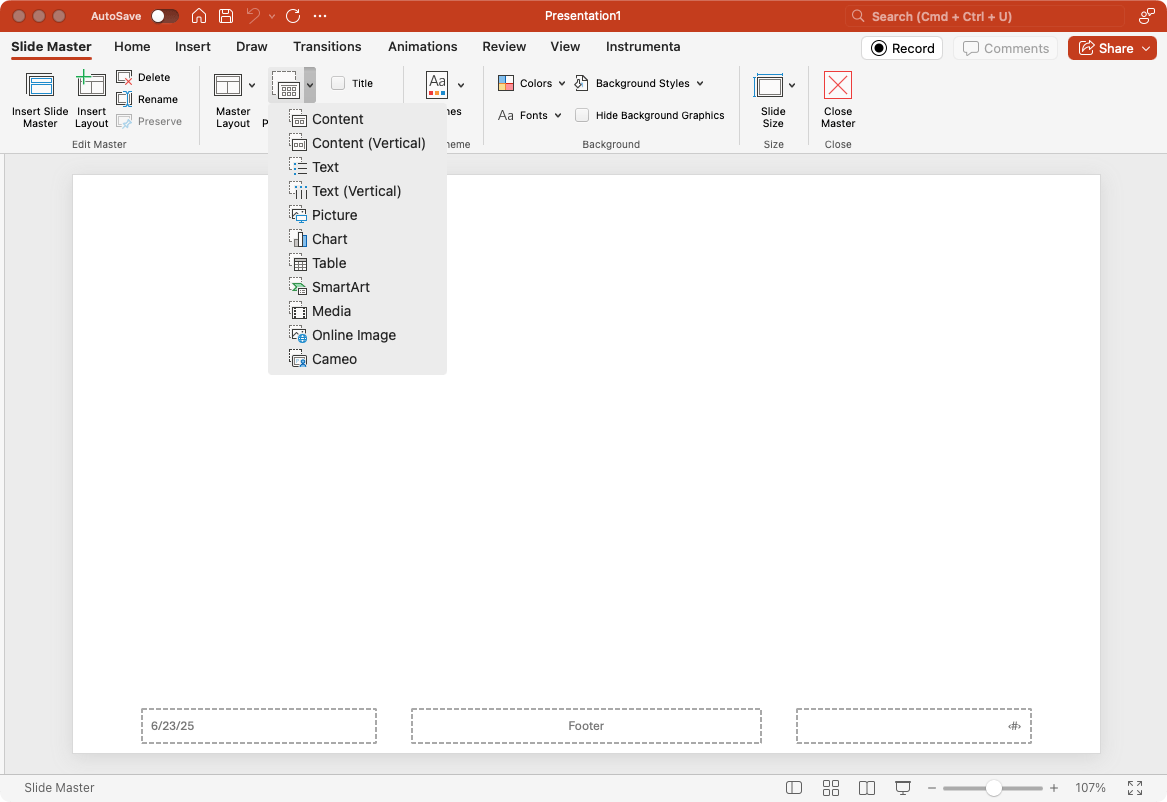
Also, note that the Picture and Online Image placeholders currently work the same way with no other distinction than the placeholder’s name.
Related: How to make PowerPoint slides that look good
How to add placeholders in PowerPoint
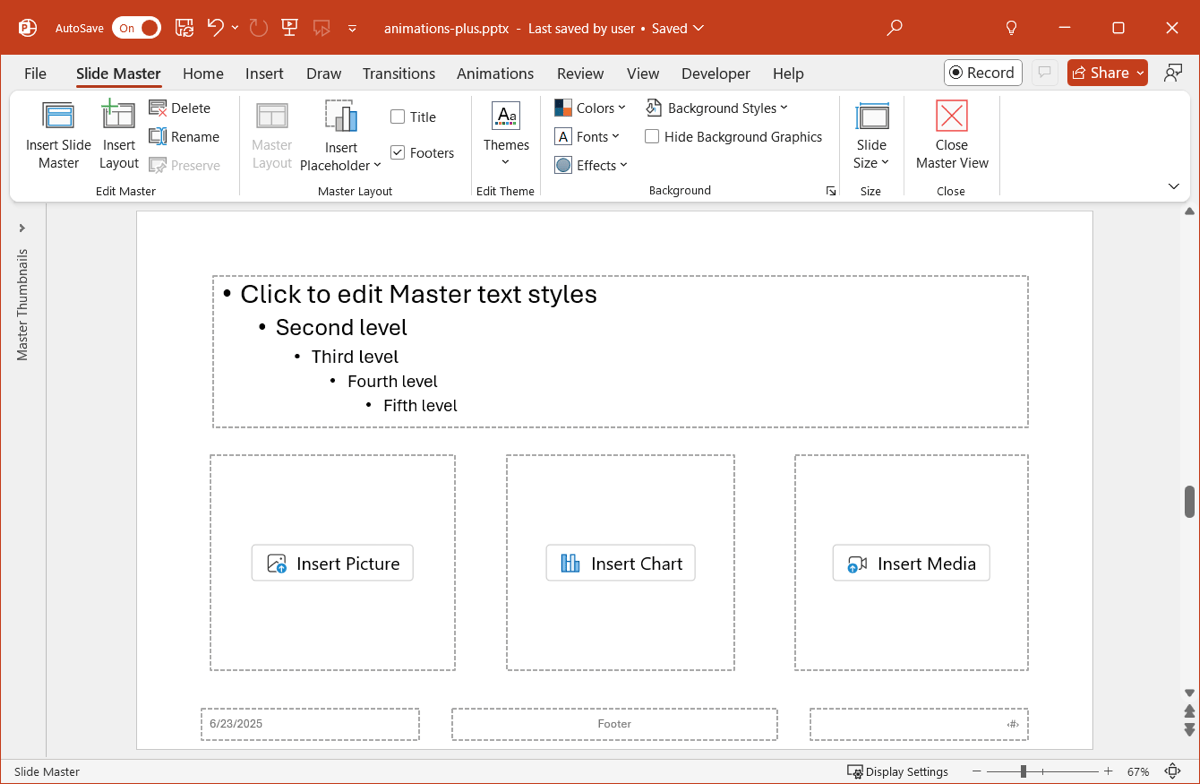
When you’re ready to add your own placeholders to a slide layout, you’ll use the Slide Master in PowerPoint. You cannot insert placeholders using any of the common views.
- Go to View and select Slide Master in the Master Views section of the ribbon.
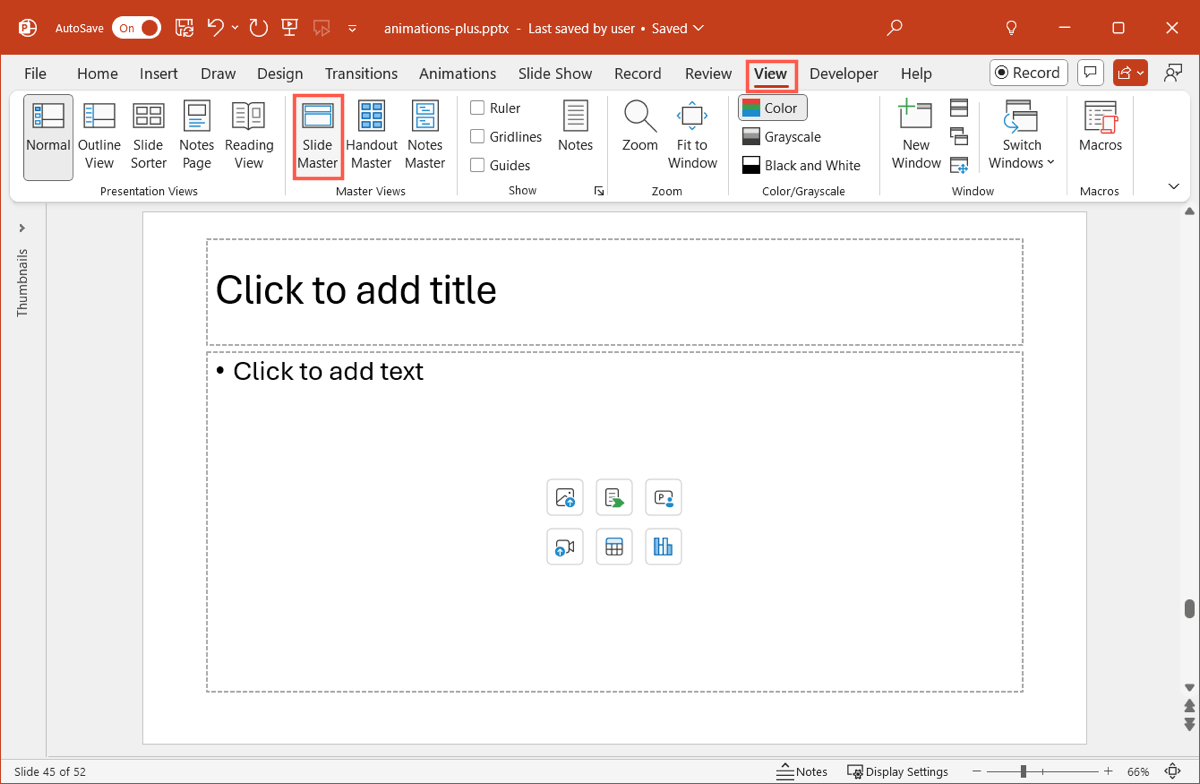
- Choose a slide layout on the left. To start with a clean slate, you can pick the Blank Layout which gives you an entire empty slide to add your placeholders.
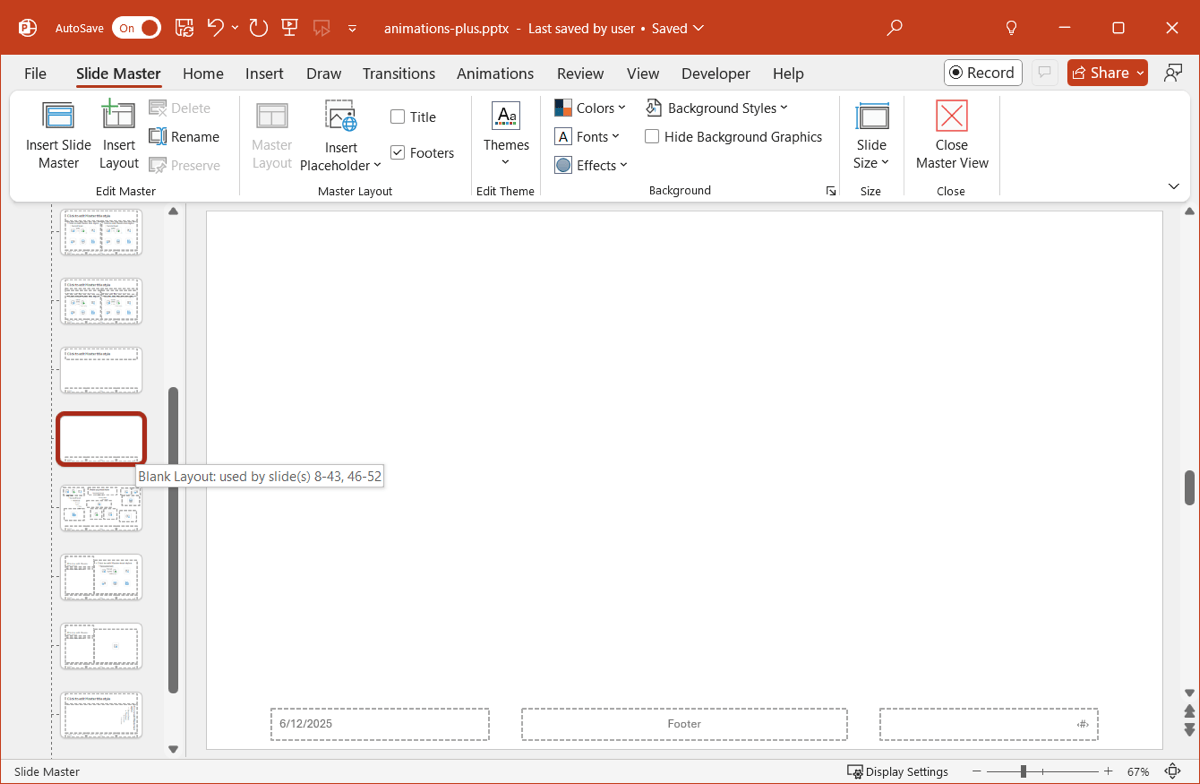
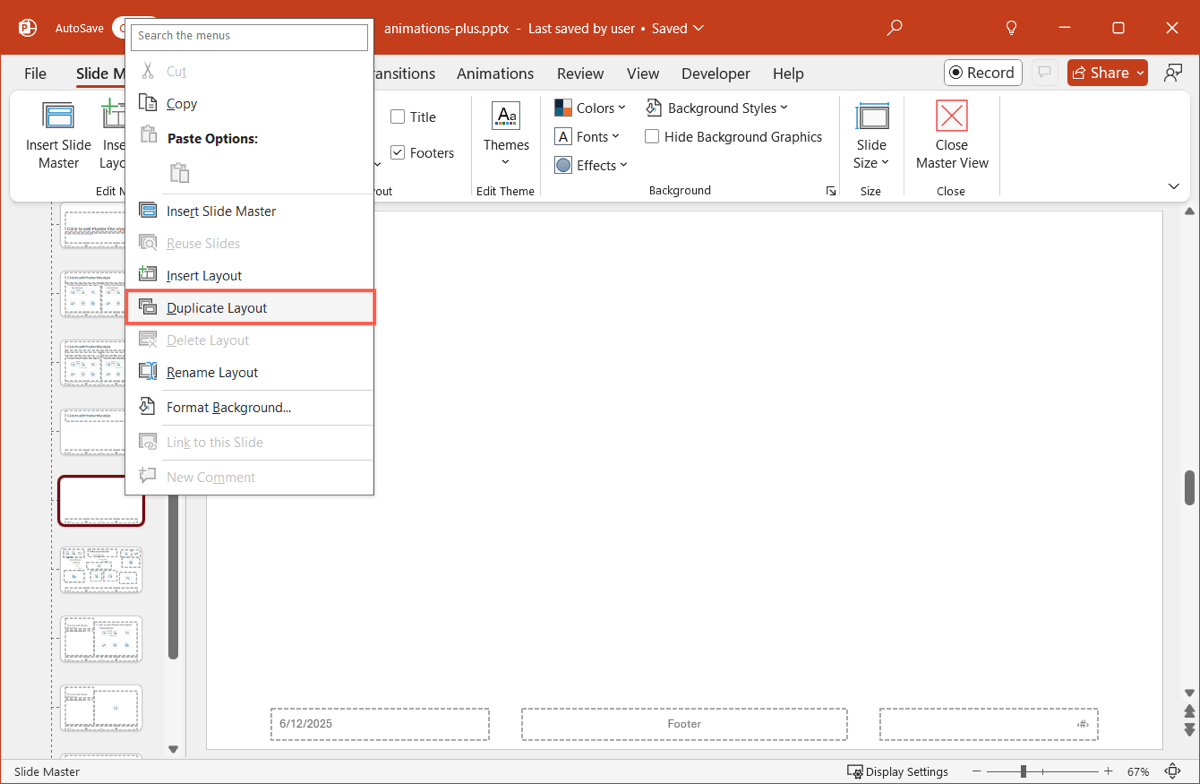
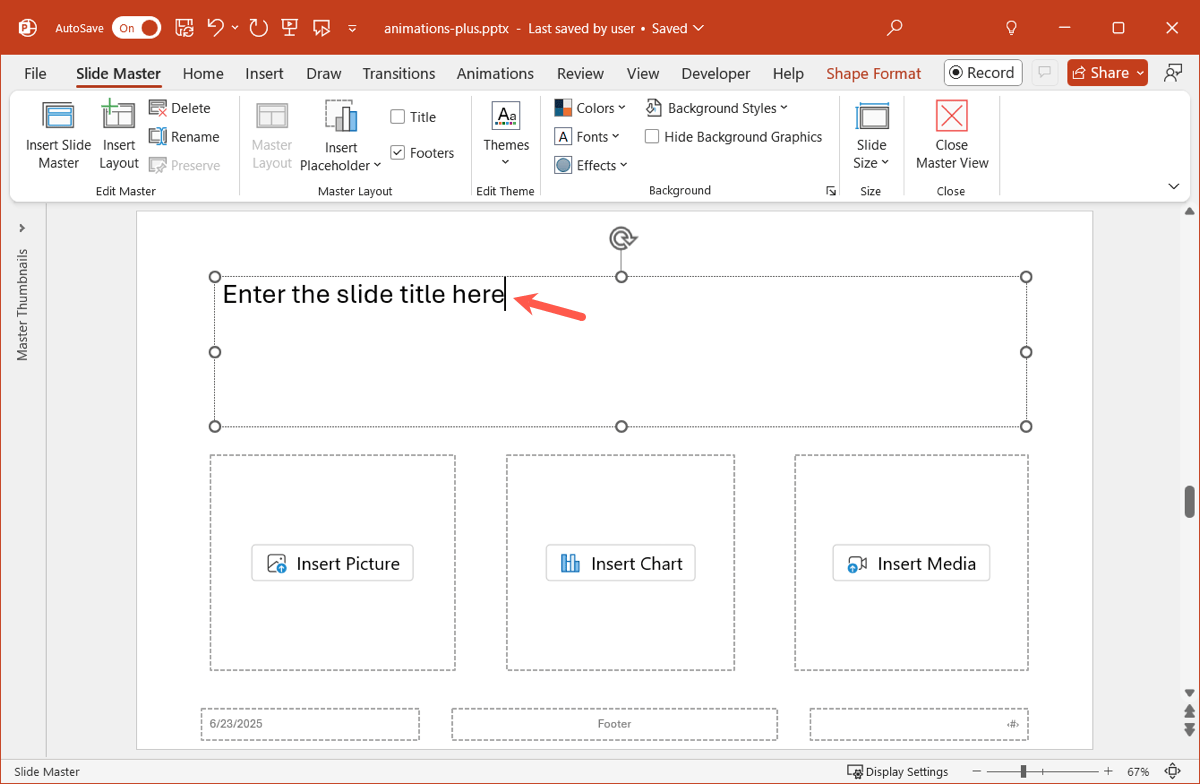
- It’s recommended that you don’t change the existing pre-built layout you select, but instead, duplicate it and then make your edits. This allows you to keep that layout as-is and still use it, but copy it to create the custom layout you want.
Right-click the layout and choose Duplicate Layout.
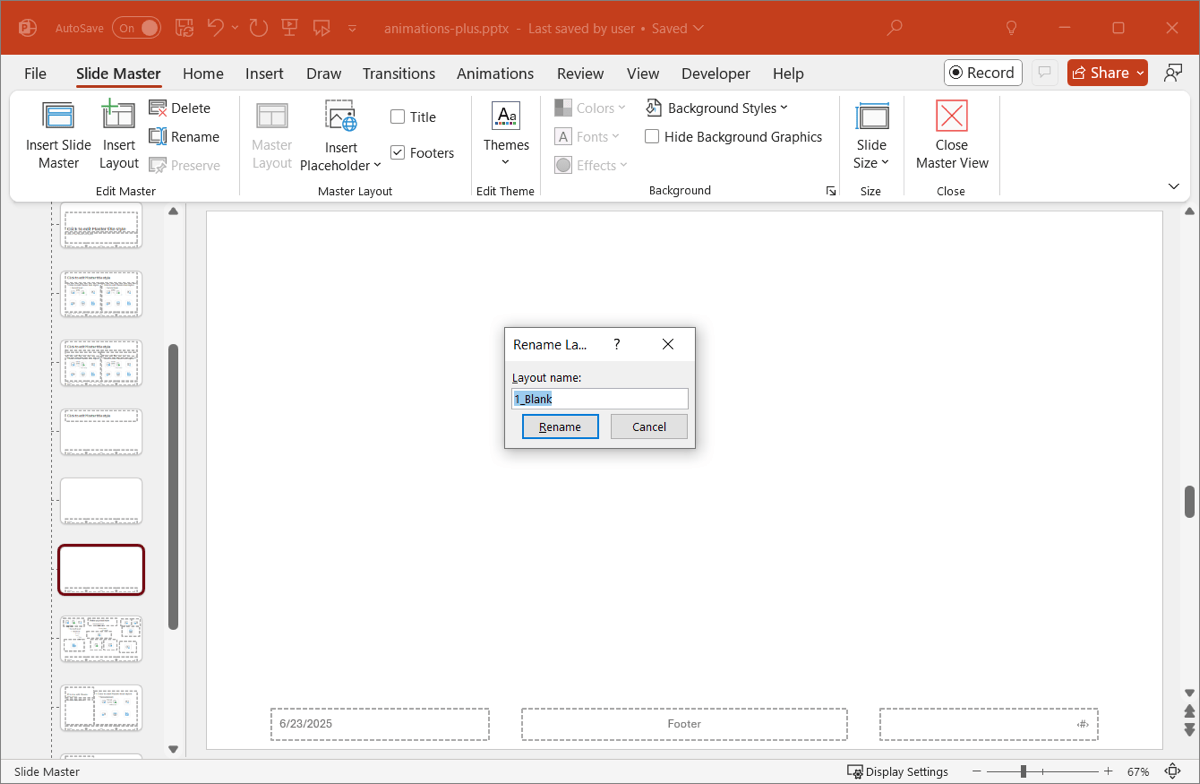
- Optionally, give the duplicated layout a new name. Right-click it, pick Rename Layout, and enter the name in the box that appears. If you don’t want to name the custom layout, you’ll notice a default name for it.
- Use the Insert Placeholder menu in the Master Layout section of the ribbon to select the type you want to add.
- Draw the placeholder on the slide in the size and location you want. Note that you can resize or move placeholders if necessary.
- If you add a Content or Text placeholder, you can change the default text inside the box if you like. Just replace the text with your own and it’ll appear when you use the placeholder in Normal view.
- When you finish, go to the Slide Master tab click Close Master View. You’ll then return to the normal editing view.
How to use placeholders in PowerPoint
Once you have your custom layout and placeholders, the rest is a breeze.
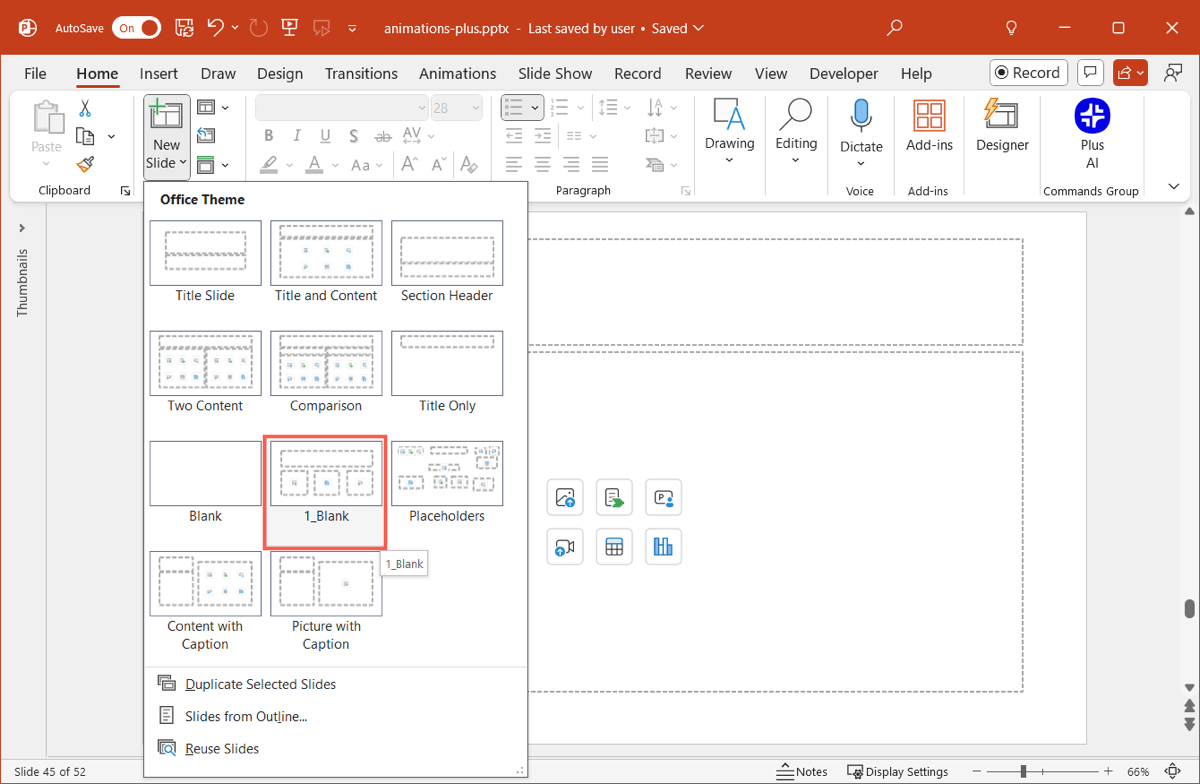
Add a new slide and pick the new layout or select an existing slide and go to the Home tab, open the Slide Layout menu, and choose the layout containing your placeholders.
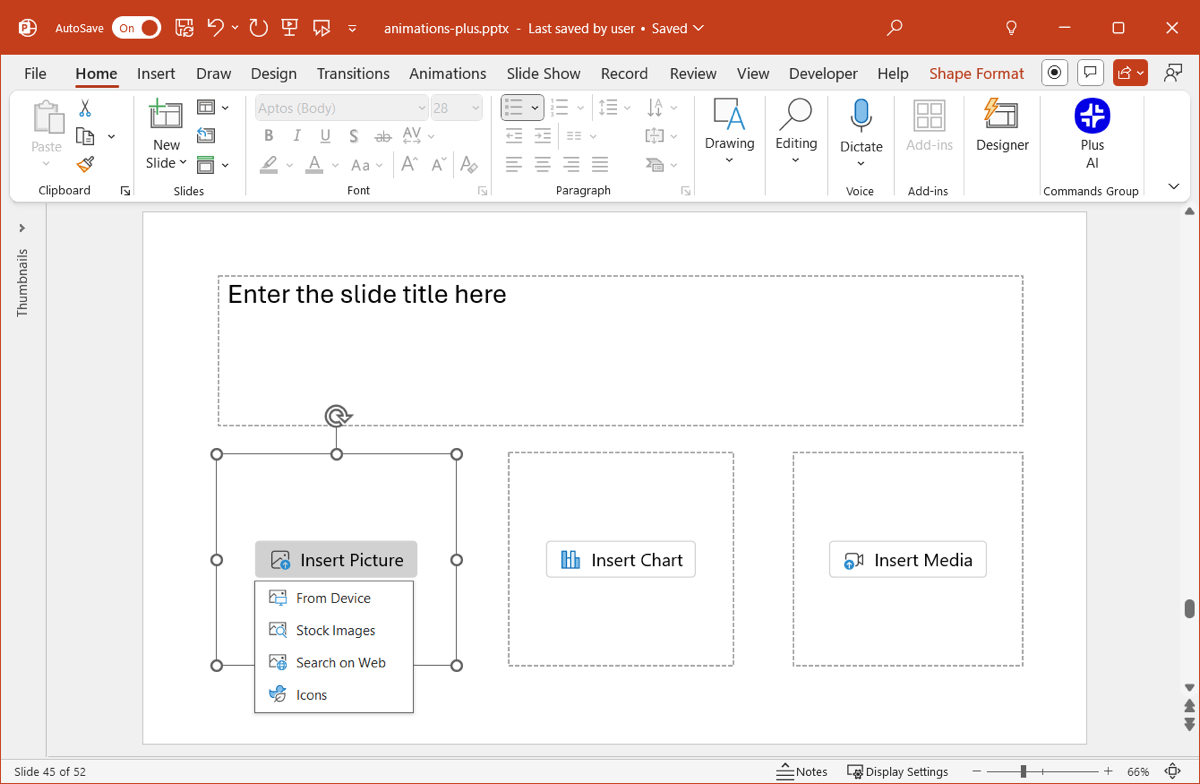
Select a placeholder to add the element.
If you want to format the slide element differently, select it and make your changes. For example, if it’s a Text placeholder, you can adjust the font style, size, or color. You can also resize or move the box if necessary.
Related: The best PowerPoint fonts
Get effective preformatted layouts with Plus AI
Assembling slide elements isn’t always easy. After all, you want a layout that’s attractive, effective, and adds to your audience’s understanding of the content.
With Plus AI for PowerPoint, you can choose from a large variety of slide layouts that go beyond PowerPoint’s current offerings. You can add a timeline to a project presentation, include pros and cons for a product slideshow, and add customer testimonials for a service presentation.
Along with editing existing slideshows and remixing slide layouts, you can create entire PowerPoint presentations with Plus AI. And, the tool works with Google Slides too, if that’s your preferred application.
Visit the Plus AI website for complete details, features, and examples along with information on starting your free trial.
Conclusion
If you have a bit of time to create a custom layout, then using placeholders in PowerPoint is definitely worth that time. And remember, you can build PowerPoint or Google Slides presentations without all the work using Plus AI!
FAQs
What is the Slide Master in PowerPoint?
The Slide Master in PowerPoint dictates the appearance of your slides. With it, you can control the layouts, formatting, and overall look and feel for consistency throughout the slideshow.
How do you change the layout of a slide in PowerPoint?
To change the layout of a slide, select the slide and go to the Home tab. Open the Slide Layout menu and choose the one you want to use.
How do I insert a text box in PowerPoint?
To add a text box to a slide in PowerPoint, head to the Insert tab. Select Text Box in the ribbon, draw the box on the slide, and place your cursor inside the box to enter your text.