
Resources
How to add columns in PowerPoint
Here are 3 simple ways to organize your information and create columns in PowerPoint

Just like when creating documents, slideshows can benefit from a column layout. You may have lists, pros and cons, instructions, or similar that would make the content clearer if presented in columns.
We’ll walk you through a few simple methods for adding columns in PowerPoint. Depending on your content and intent, you can use whichever works best for you.
Method 1: Use the Plus AI presentation maker
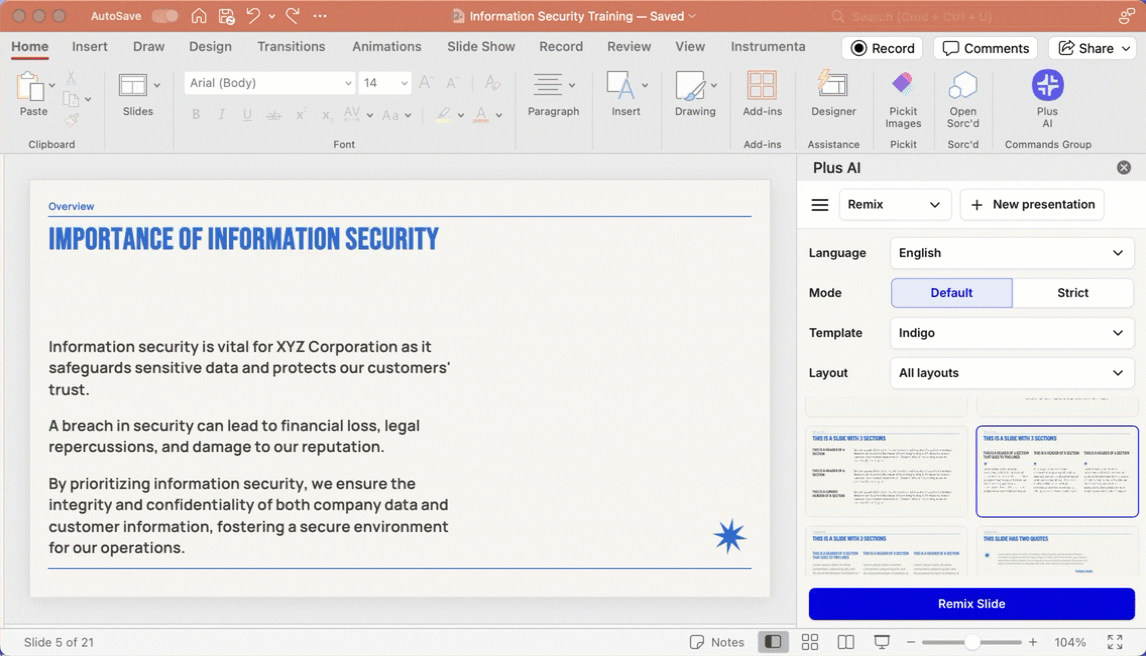
The simplest way to add columns to a slide in PowerPoint is using a presentation maker with built-in layouts. For instance, Plus AI for PowerPoint and Google Slides provides a variety of column-style formats and converts your existing text and content to the layout of your choice without any extra manipulation.
- Select the slide you want to add columns to and go to the Home tab.
- Click Plus AI in the ribbon and pick Edit with AI.
- Choose Remix a slide.
- Optionally select a Template for the appearance and use the Layout menu to pick a column format.
You can choose one the Section layouts, a Text-based layout, or one for Pros and Cons depending on your content.
- Click Remix Slide and you’ll see the updated column layout on your slide.
Visit the Plus AI website for a feature list, sample presentations, and to start your free trial.
Method 2: Apply the column layout to a text box
Maybe you have a simple text box where you want to use columns rather than a paragraph format. Unlike adding columns in Google Slides, PowerPoint provides a feature for you to do this.
Select the text box on the slide, go to the Home tab, and open the Add or Remove Columns menu in the Paragraph section of the ribbon. Then, do one of the following:
- Pick the number of columns from one, two, or three.
- Choose More Columns and use the pop-up box to enter the number of columns and optionally, the amount of spacing between columns. Click OK.

You can then adjust the text and spacing to accommodate the new column layout.

Tip: Make adding content to slides simpler by using placeholders in PowerPoint.
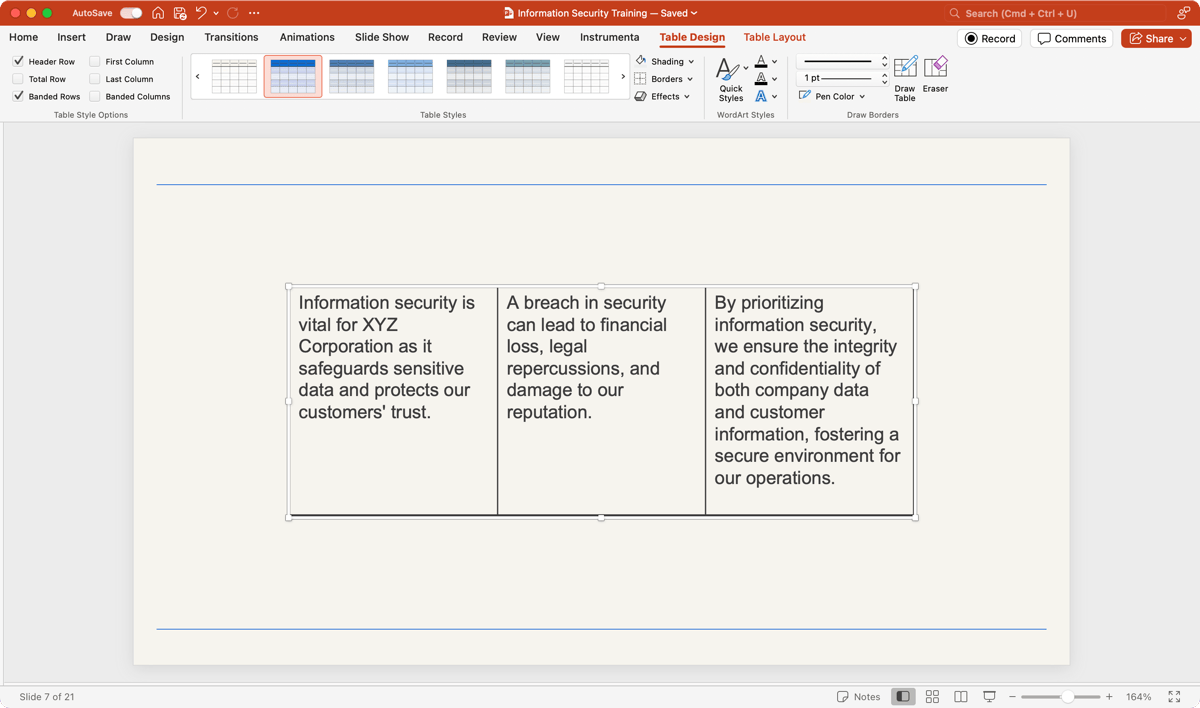
Method 3: Insert a table with columns
Another way to add columns in PowerPoint is to use a table which provides a solid structure for your content. This is helpful if you want the entire slide including content, images, and other elements in a column format.
- Select the slide for the columns and go to the Insert menu.
- Use the Table menu in the Tables section of the ribbon to pick the number of columns and rows.
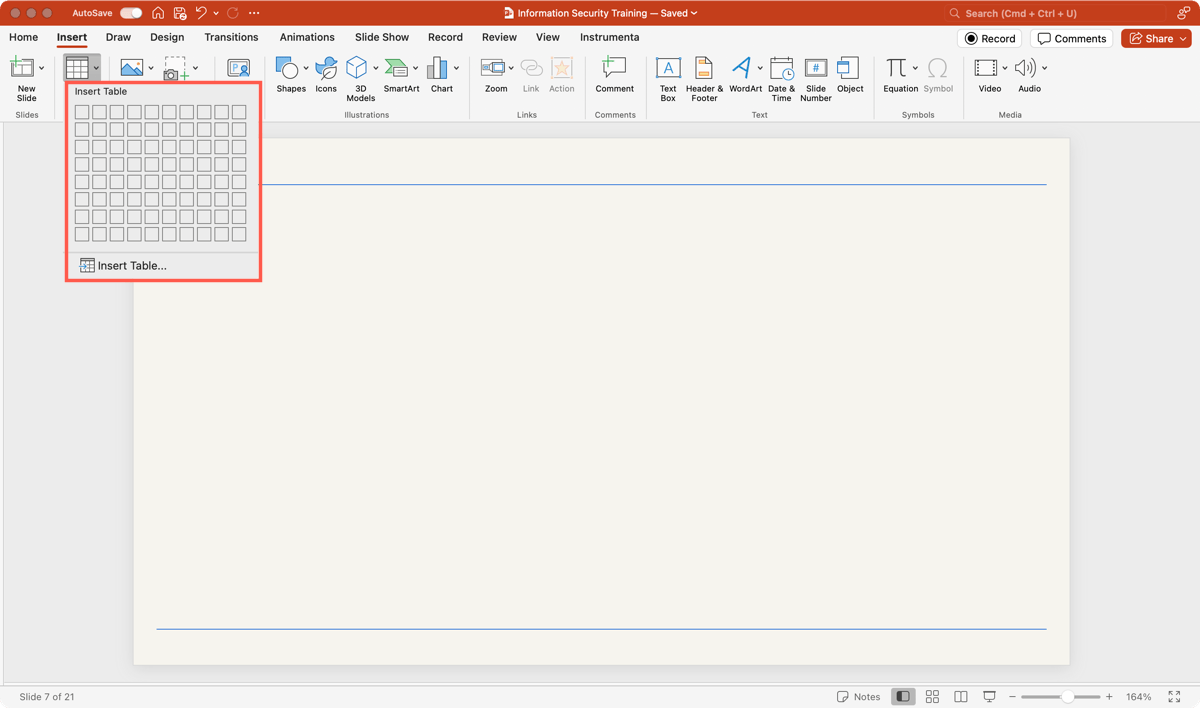
- When the table appears, place your content in the columns as you wish.
- You can optionally adjust the format of the table to remove the borders, apply shading, or add and remove columns using the Table Design and Table Layout tabs.
Tip: Learn how to create a table of contents in PowerPoint for easier navigation through the slideshow.
Method 4: Locate a template with columns
If you’re creating the presentation from scratch and want to start right off with a column layout, you can also use a template. You’ll find many template styles and options within PowerPoint or online.
Alternatively, you can begin with one of Plus AI’s attractive templates. Visit the template gallery to preview the options and select one to view the details and what it includes.

Conclusion
Using columns for your content in PowerPoint adds professionalism, attractiveness, and an effective structure. And keep in mind that you can save a ton of time using the premade slide layouts for your columns with Plus AI!
FAQs
How can you add an extra column to an existing table in PowerPoint?
To insert an extra column in a table, select a current column and either go to the Table Layout tab or right-click and move to Insert. Then, choose Insert Column Left or Insert Column Right. Repeat to add more columns.
How do I split columns in PowerPoint?
You can split a column into multiple columns easily when using a table in PowerPoint. Select the column, go to the Table Layout tab, and choose Split Cells in the Merge section of the ribbon. Use the pop-up box to enter the number of columns, and optionally rows, and click Insert.
How to distribute columns in PowerPoint?
You can distribute columns with a simple click if you use a table in PowerPoint. Select the table, go to the Table Layout tab, and choose Distribute Columns in the Cell Size section of the ribbon.