Would you rather sit through a long, boring presentation or enjoy an engaging, interactive slideshow?
There are many ways that you can immerse your audience in a presentation for your topic. With these 10 ways to make Google Slides interactive, you can better engage your audience and give them a slideshow to remember.
{toc}
1. Add hyperlinks
You can include links to other slides, external websites, and files and documents. This gives your audience a way to jump to particular slides such as when using a table of contents in Google Slides. But you can also give viewers the option to get additional information outside of the presentation or open files pertaining to the topic.
Plus, you can add the hyperlinks to text, images, and objects for flexible ways to include the interactive elements.
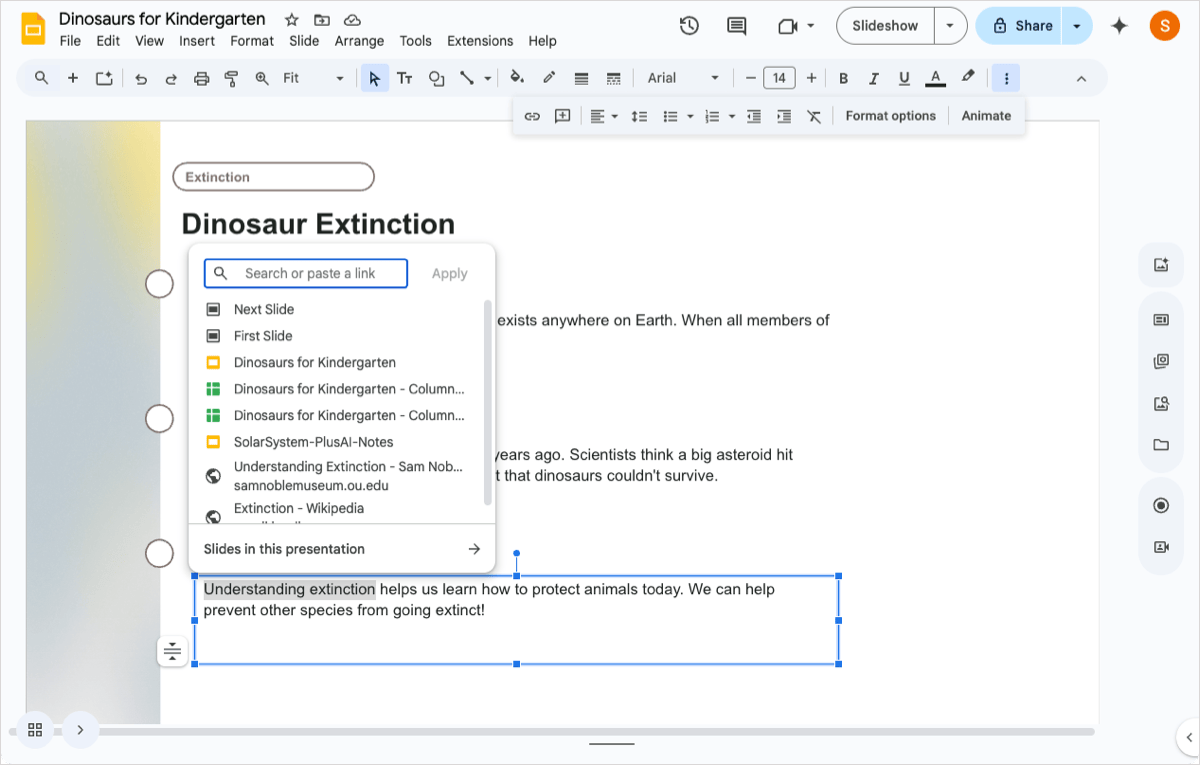
To add a hyperlink, select the item you want to link and do one of the following:
- Click Insert Link in the toolbar.
- Go to Insert > Link in the menu.
- Right-click and pick Link.
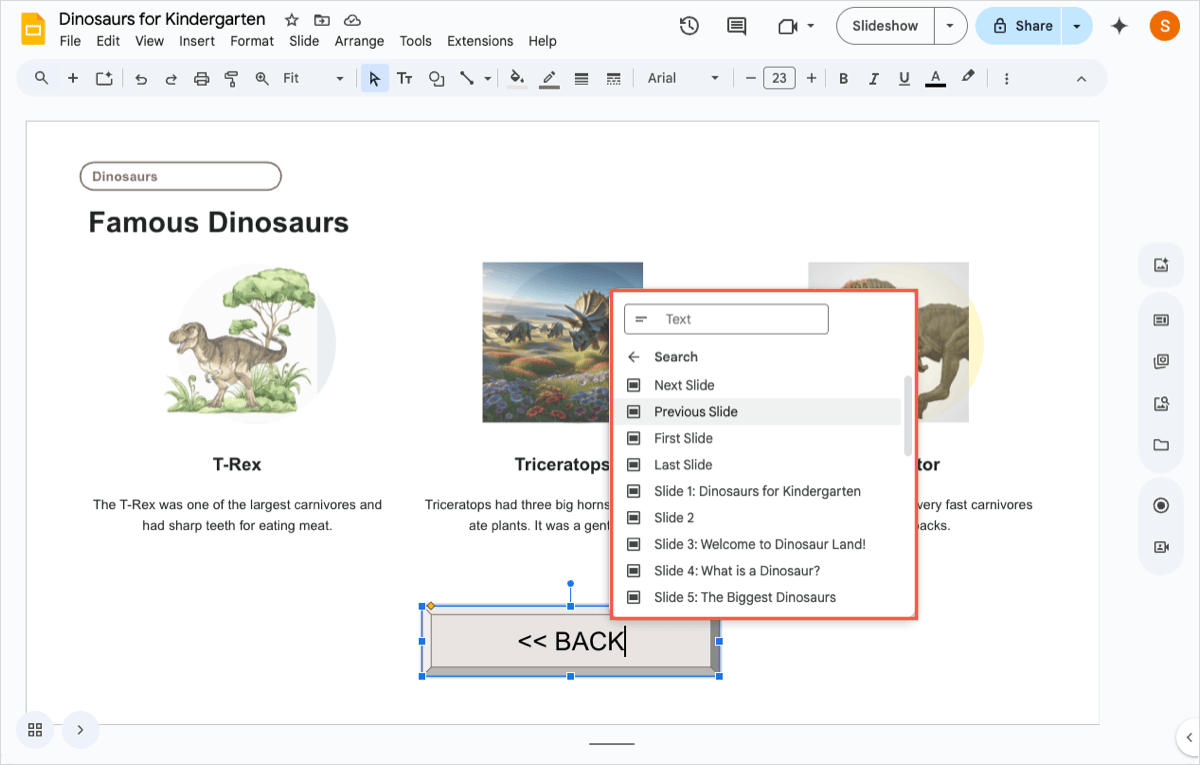
2. Insert clickable buttons
To have your audience move forward or back, select answers for a quiz, or make decisions, you can use clickable buttons. This provides an interactional experience and can make the presentation more engaging.
You simply insert a shape which you can format to look like a button and then add a link to the shape for another slide in the presentation. As an example, you can create a Back button that takes the viewer to the previous slide with the below steps.
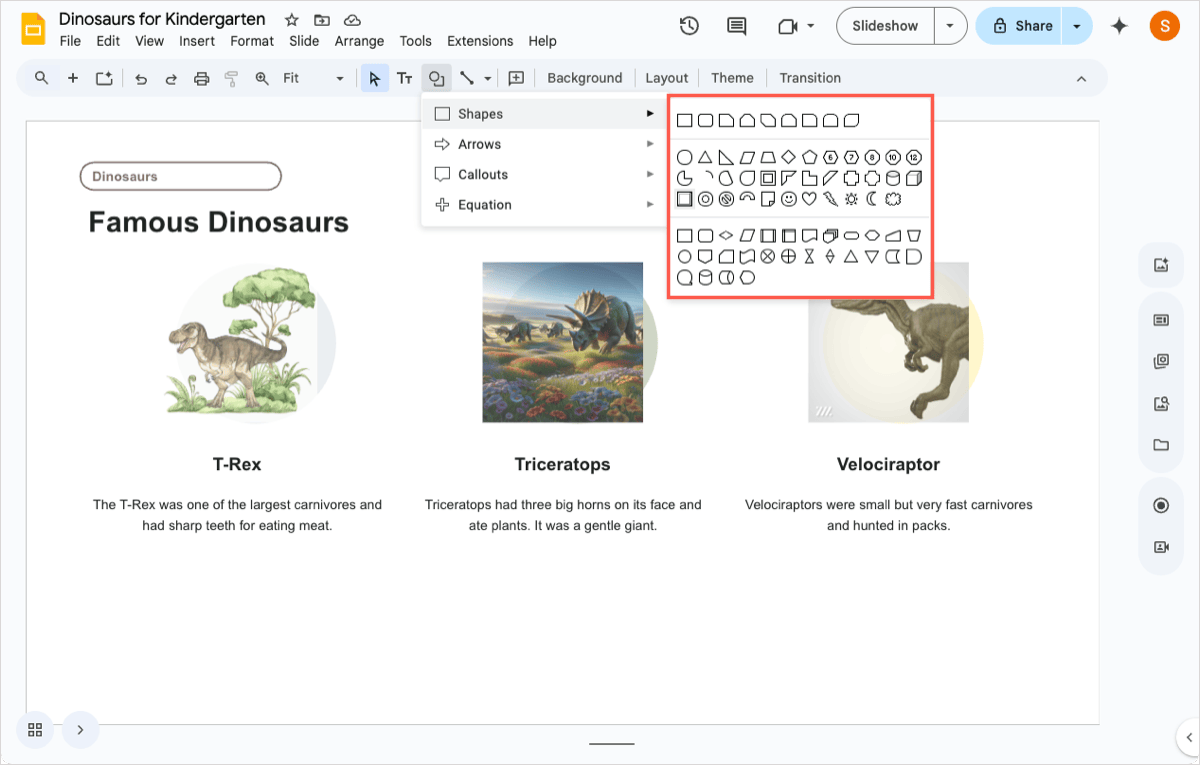
- Go to the slide, open the Shape menu in the toolbar, and pick an option. The Bevel shape has a button-like look and works well but you can pick a different shape and also use the Format Options to change its appearance.
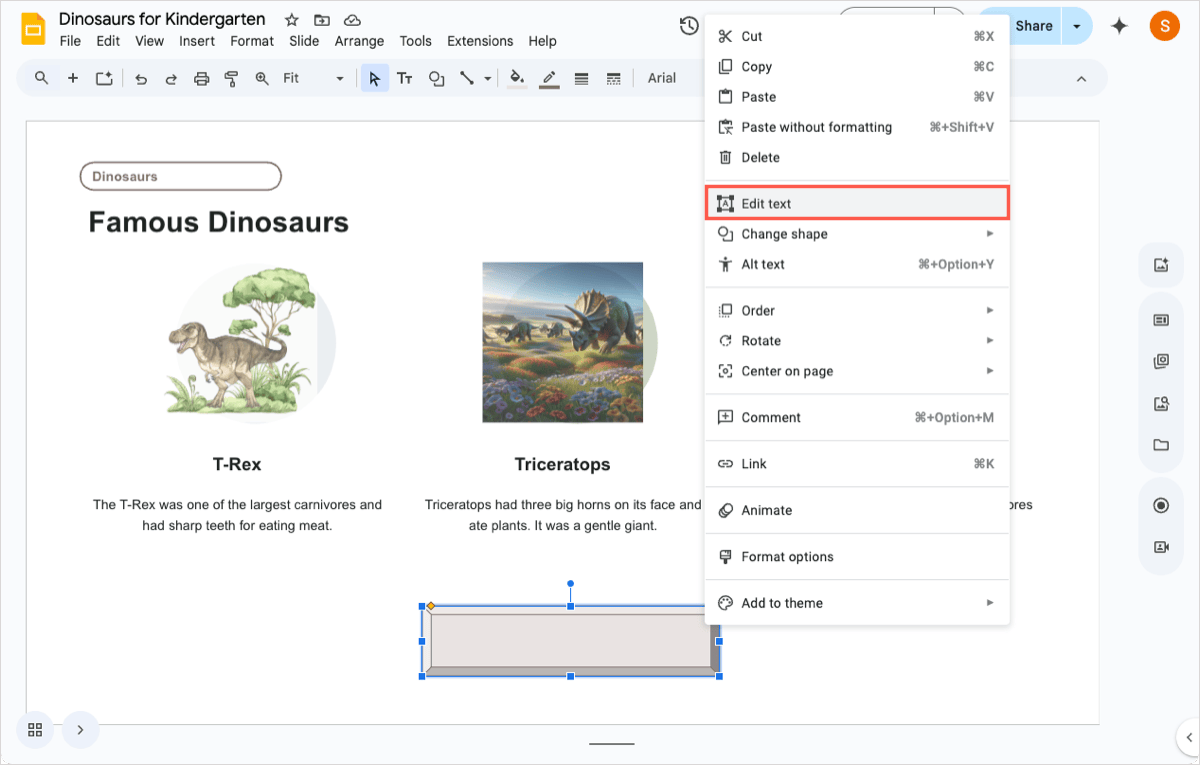
- Draw the shape on the slide, right-click it, and choose Edit text to type your button text.
- Right-click the shape again, choose Link, and select Previous Slide.
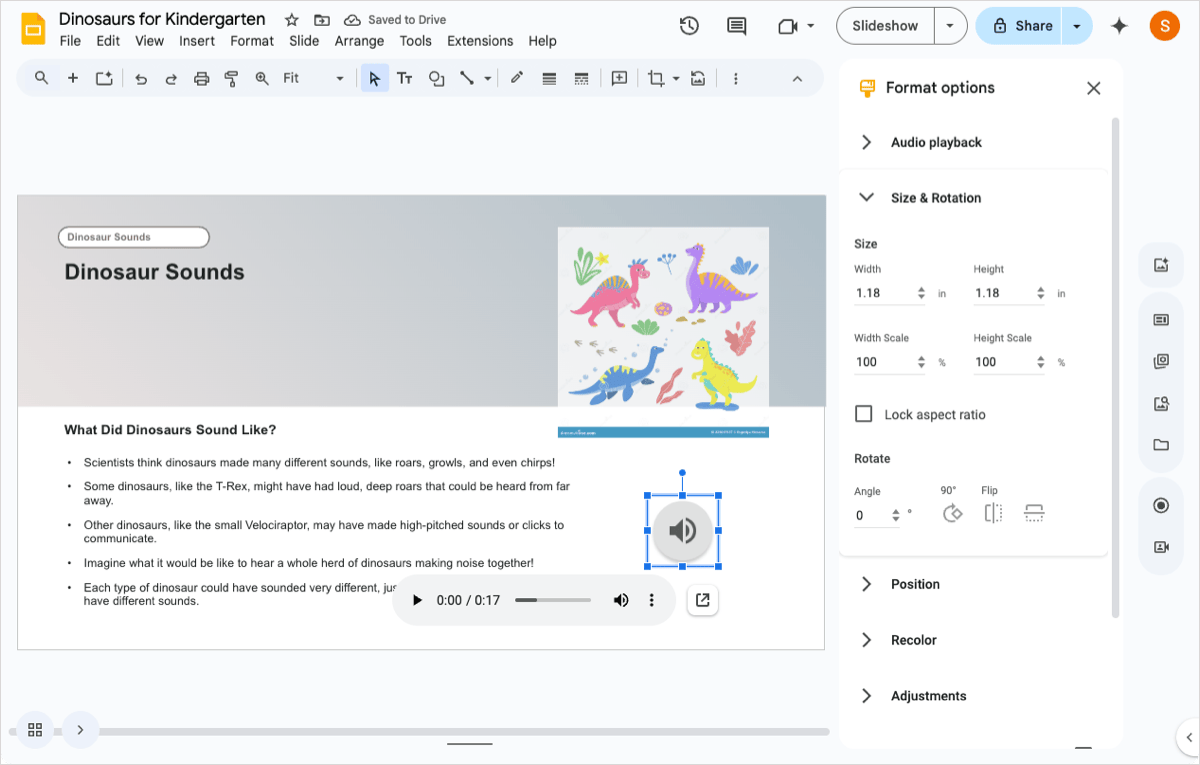
3. Include audio
You can add audio files on slides for things like music, instruction, sounds, and more. While you can have the audio play automatically, the interactivity comes in when the viewer clicks the audio icon to hear the sound.
To include audio on a Google Slide, go to Insert > Audio, choose the file, and click Insert. You can then move the audio icon, resize it, or change its appearance with the Format Options.
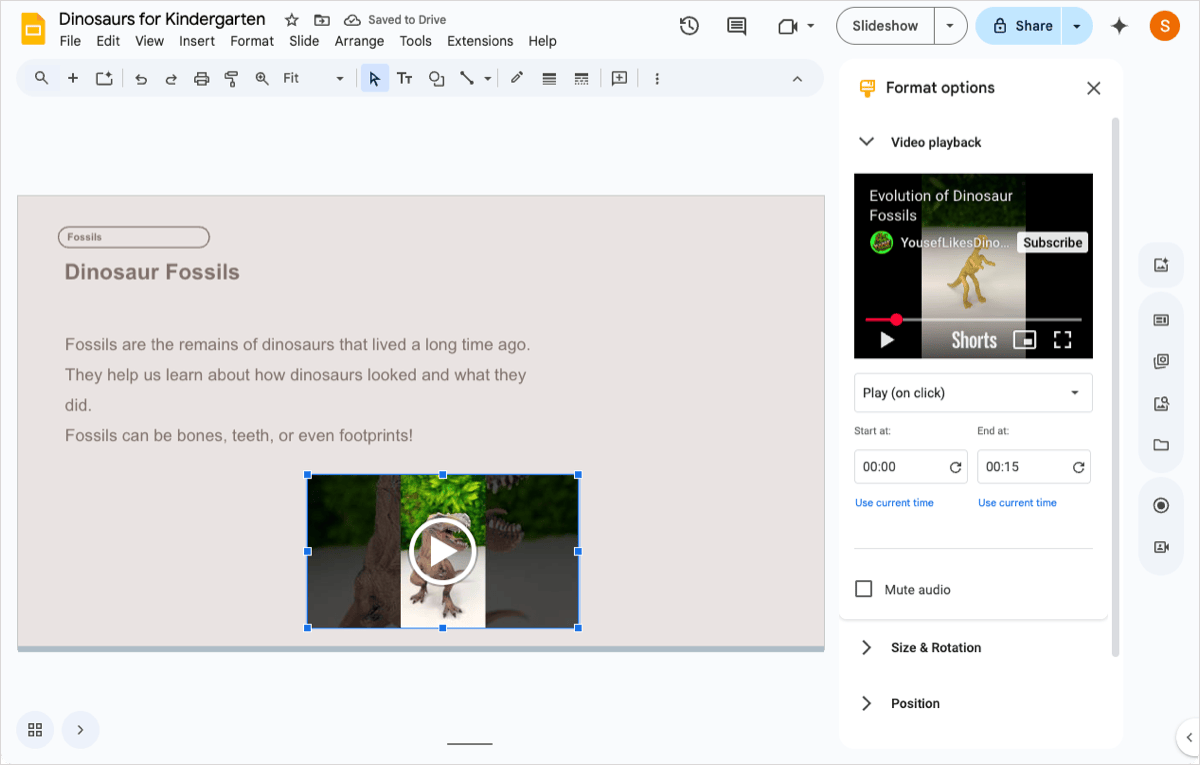
4. Embed video
To keep your audience engaged, you can enhance the presentation with video. It could be a YouTube video showing more details on the topic or one you save to Google Drive where you demonstrate a process.
To embed video on a Google Slide, go to Insert > Video, search for or choose the video, and click Insert. You can then move or resize the clip and adjust the playback options in the sidebar that appears.
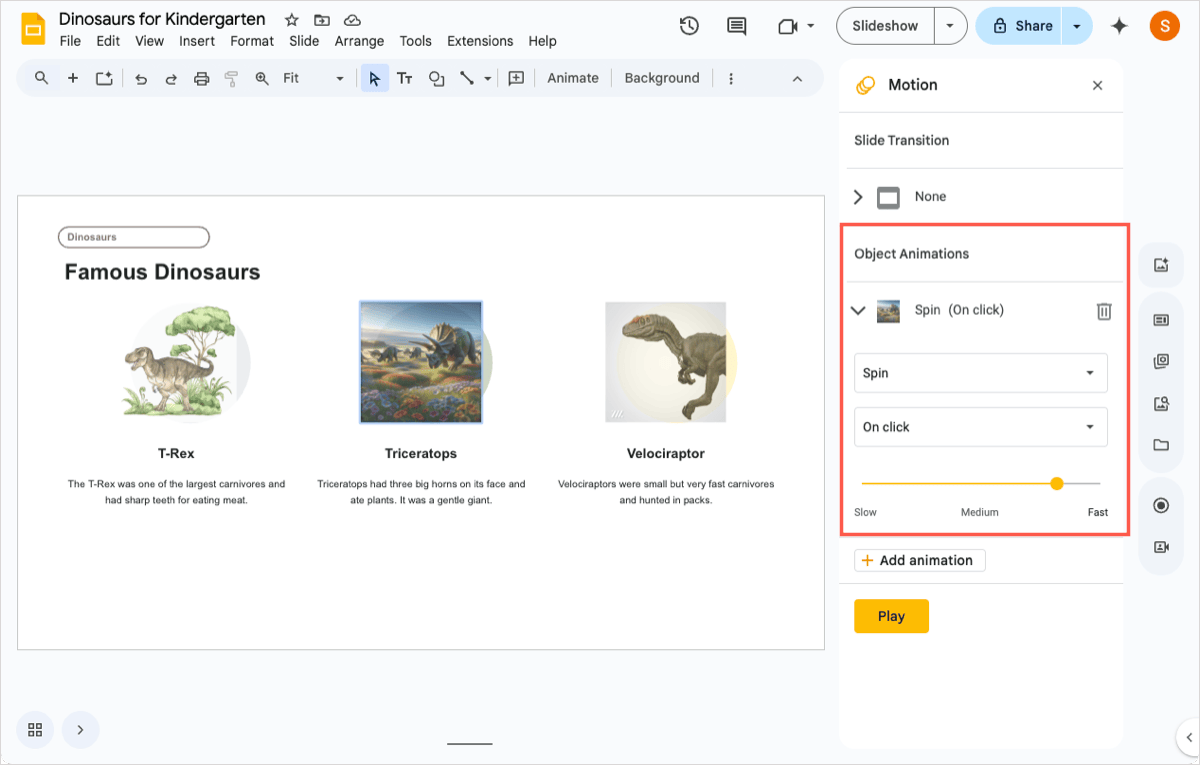
5. Add animations
Animations are additional visual elements you can use to interact with and involve your audience. As examples, you can have content appear, an object spin, or an image zoom in when you click.
To add an animation in Google Slides, select the item you want to animate and go to Insert > Animation. Then, use the drop-down boxes below Object Animations in the sidebar that appears to pick the trigger and movement.
Tip: Learn how to use animations in PowerPoint too!
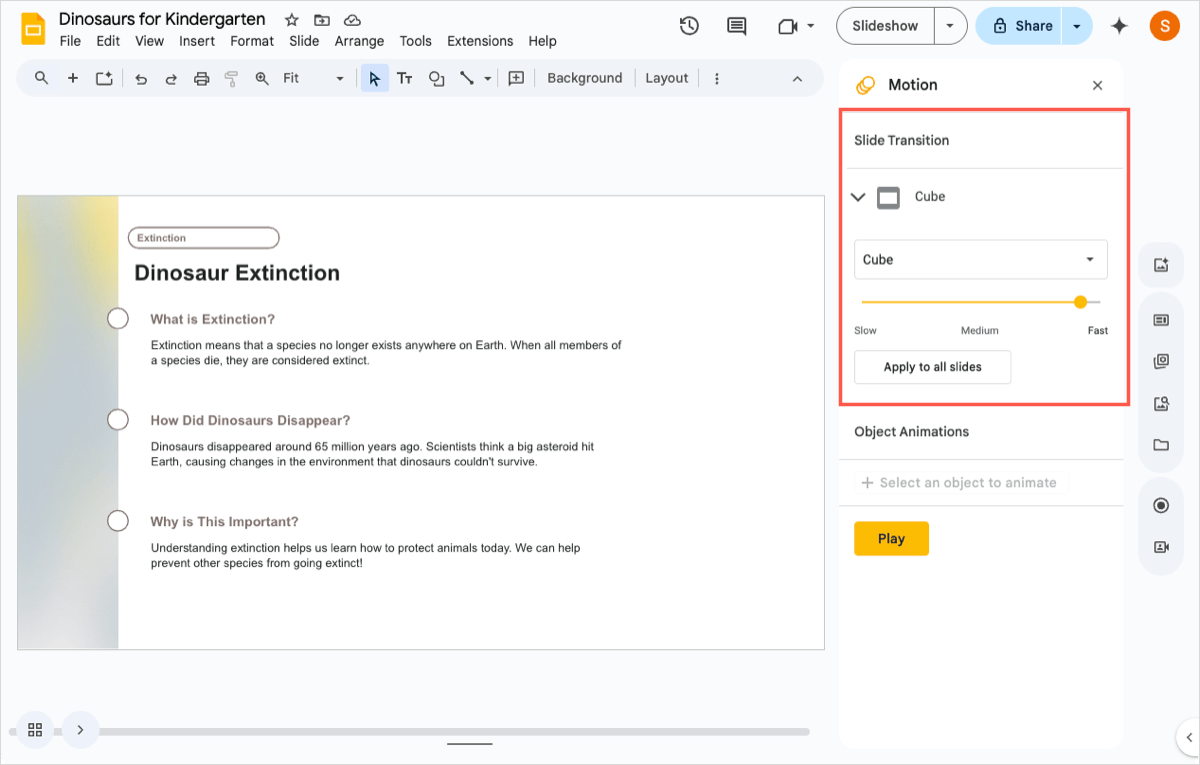
6. Insert slide transitions
Similar to animations, slide transitions show movement but occur when you click through the slides rather than when you select an object. This can give your slideshow a more interesting appearance and promotes an interactive experience as the audience sees the transition when they advance to the next slide.
To insert a slide transition, go to a slide and click Slide > Transition in the menu. Choose the type of transition in the sidebar that appears and adjust any available settings. Optionally pick Apply to all slides if you want the same transition throughout the presentation.
Tip: You can also insert transitions in PowerPoint.
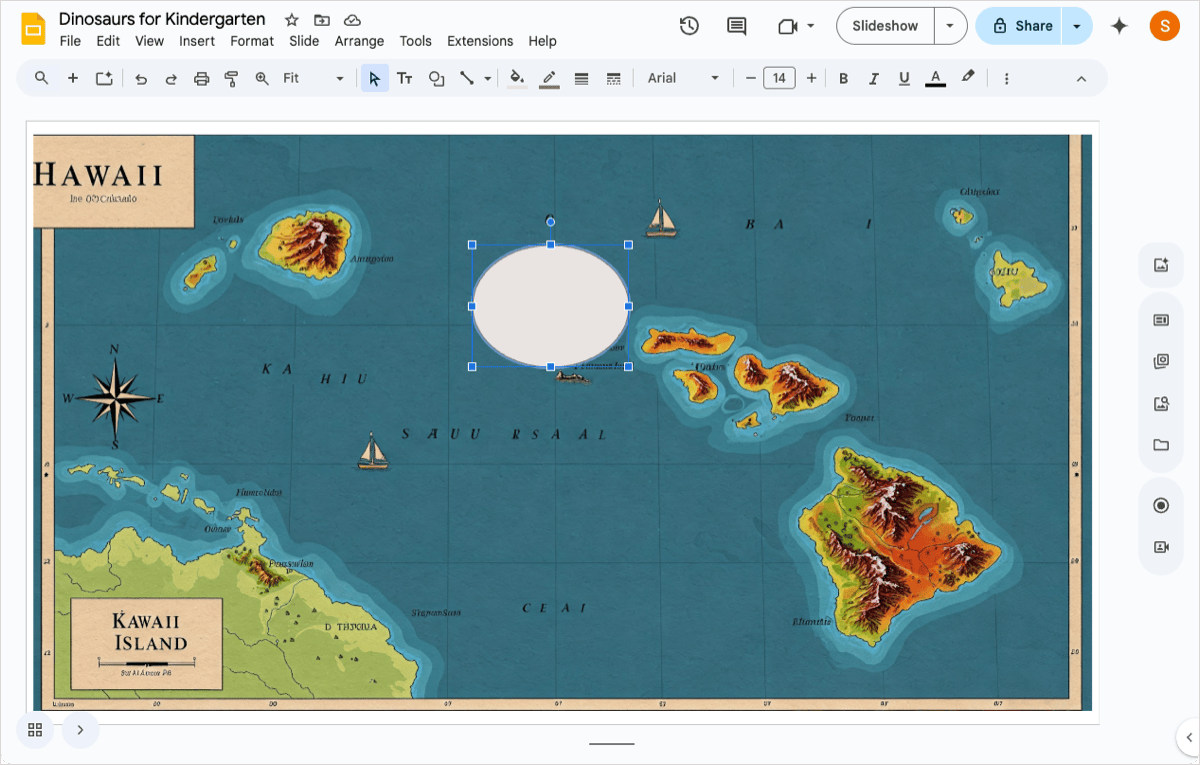
7. Make interactive maps
Whether for education or business, an interactive map can be a great addition to a presentation. You can place an image of the map on a slide and then use transparent shapes with links to other slides that provide details on the location selected.
Use the steps below to add the map, shape, and link for the first spot on the map. Then, follow the same steps for the additional locations.
- Select a slide and go to Insert > Image to add the map.
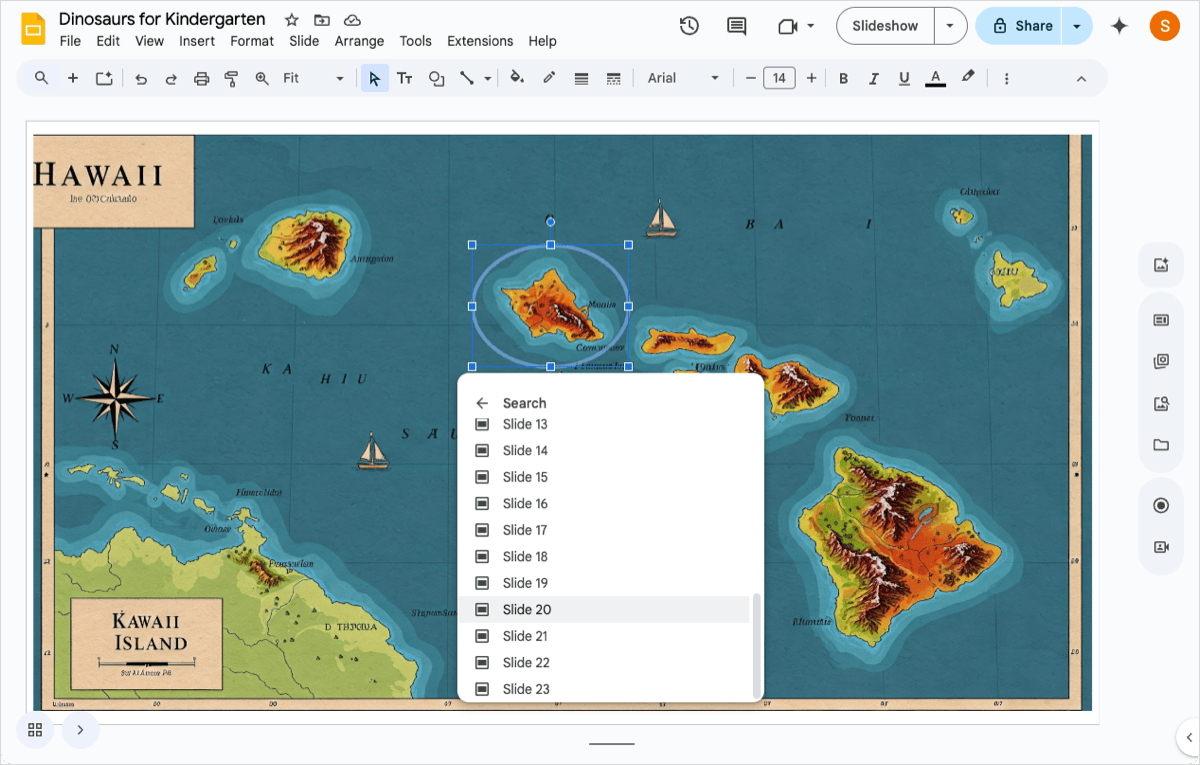
- Open the Shape menu in the toolbar and pick a shape that covers the portion of the map you need.
- Draw the shape to cover the section and pick Transparent for both Fill color and Border color in the toolbar.
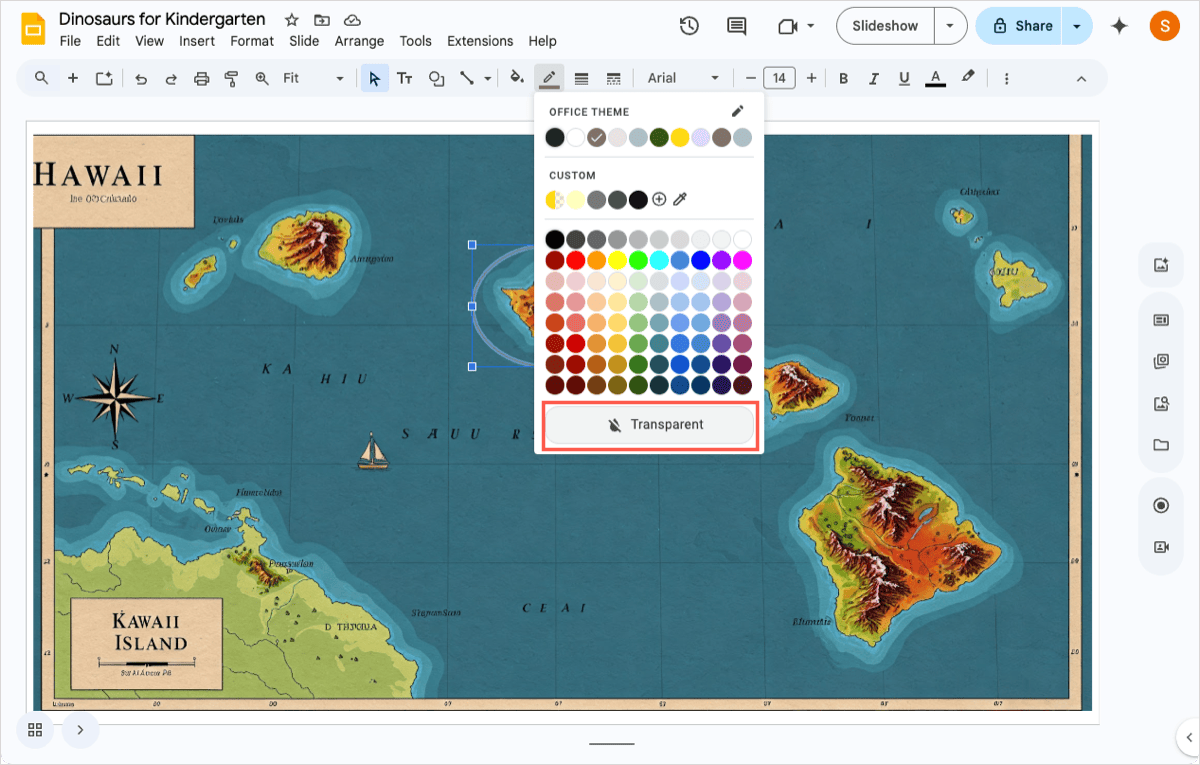
- Right-click the shape, choose Link, and select the slide.
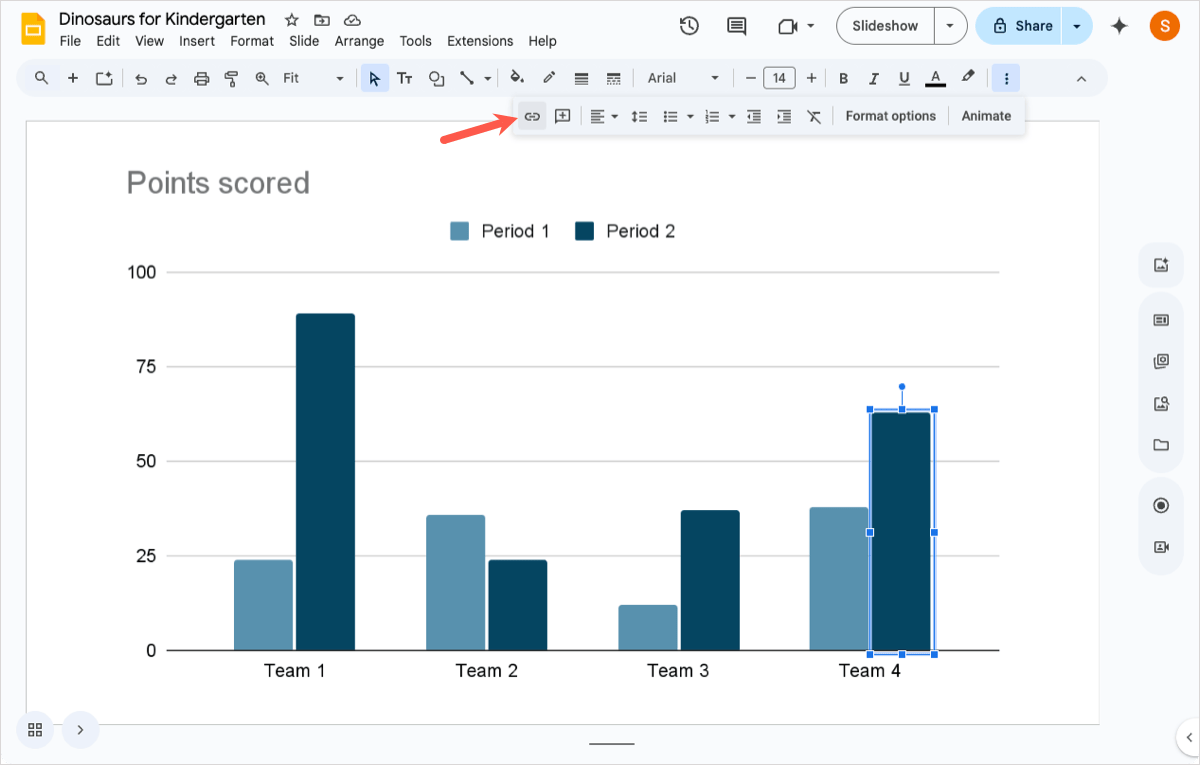
8. Use interactive charts
Like interactive maps, you can insert graphs or charts on your slide and link to specific parts for more information. Whether to another slide, file, or external source that gives additional details, interactive charts can increase interest.
- Select a slide, go to Insert > Chart in the menu, and pick the chart type.
- Edit the sample data by clicking the three dots in the chart’s floating toolbar and choosing Open source.
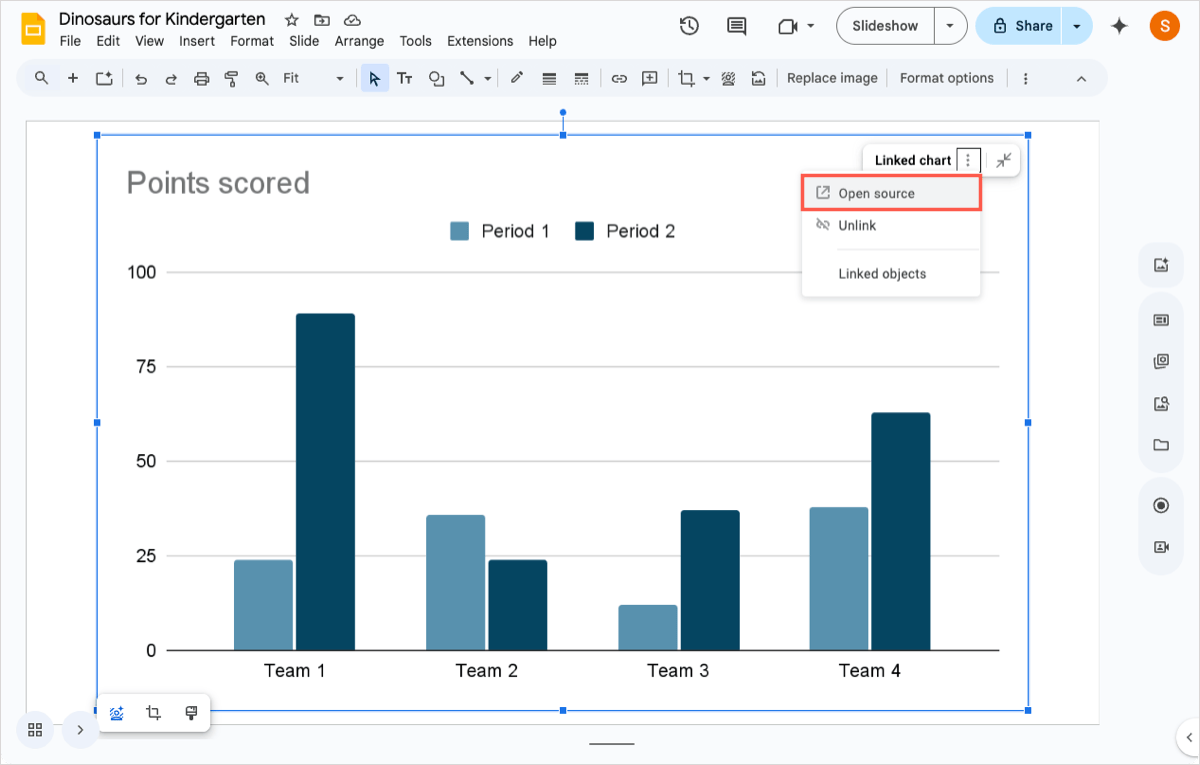
- Follow Steps 2 through 4 above to add, format, and link the shape over the portion of the chart you want. Remember, you can link to websites and files along with other slides.
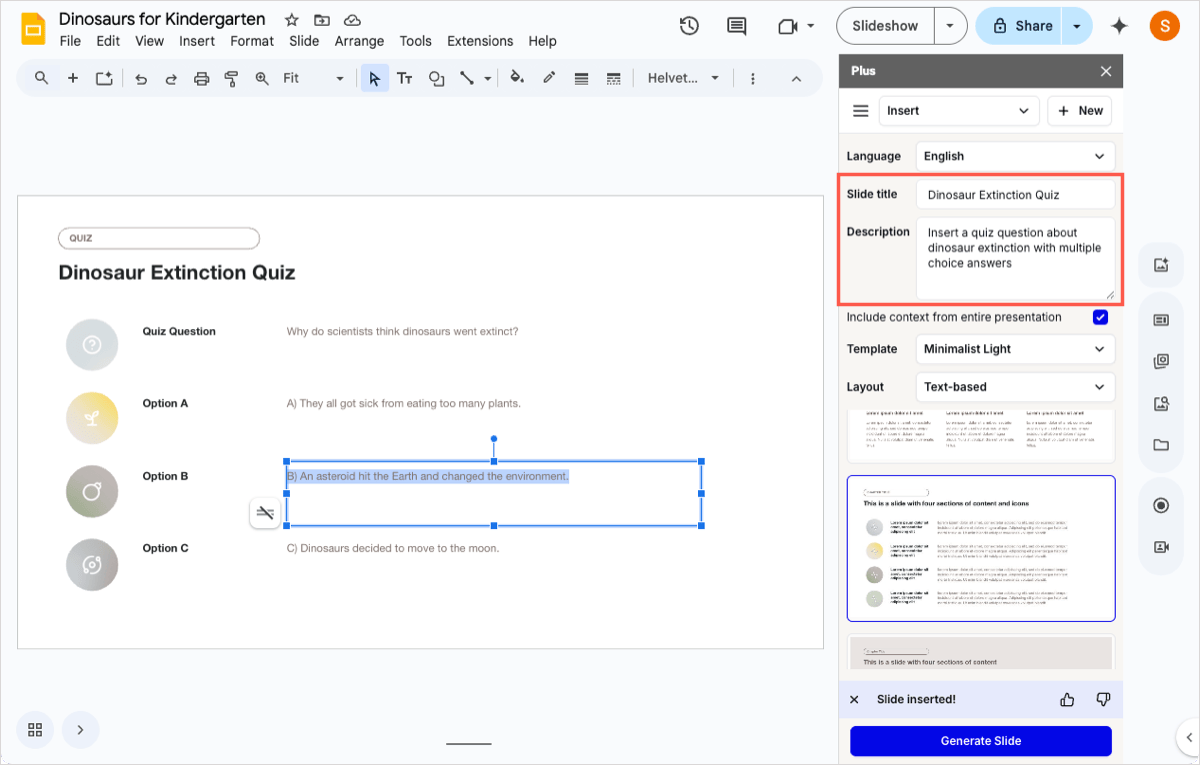
9. Set up quizzes
For students in a class, employees in a training program, or similar, you can set up quizzes in Google Slides. This can include questions with multiple choice answers, and you can create slides for correct and incorrect answers that the test-taker sees after their selection.
You can use Plus AI to create a quiz directly in Google Slides. Then, use the answers provided to apply the links to the correct and incorrect answer slides using the steps described earlier.
To learn more about Plus, visit the Plus AI website where you’ll see features, examples, and details to start your free trial. Remember, Plus works with both Google Slides and Microsoft PowerPoint!
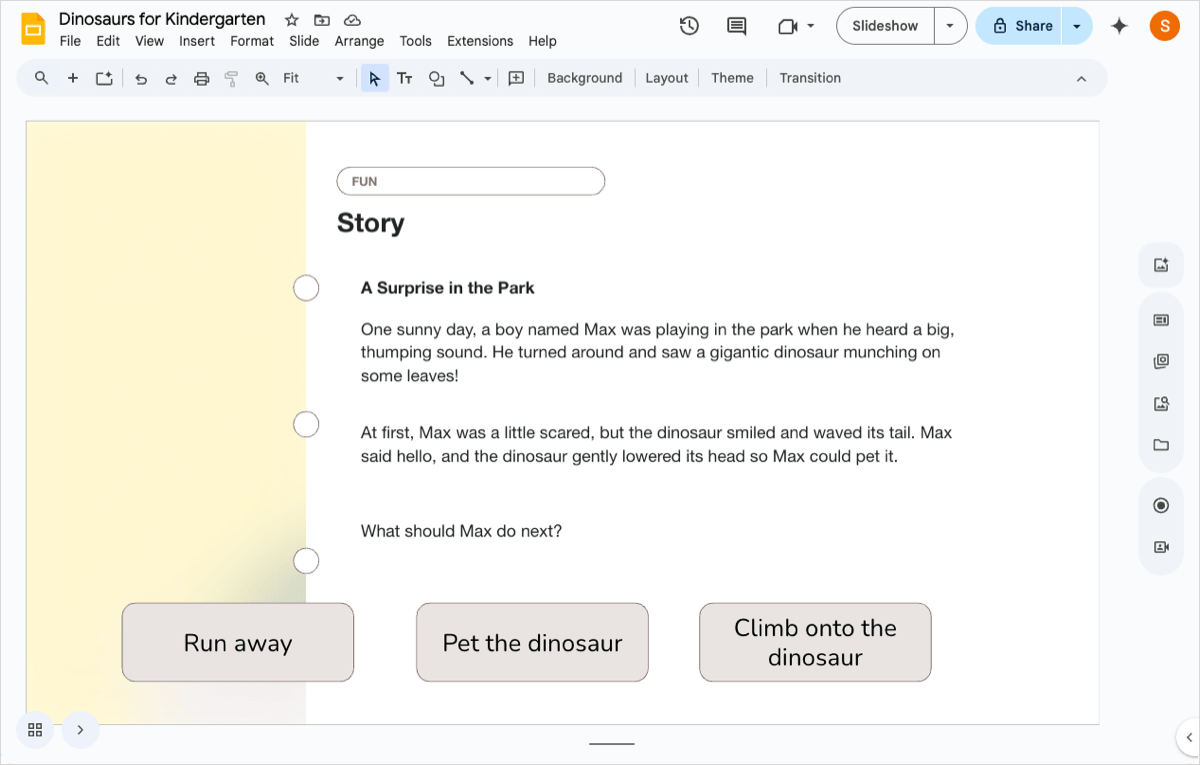
10. Create decision scenarios
Another good way to add interactivity for students or trainees is with decision scenarios. For example, you can make an interactive story where the viewer’s choices drive the outcome or an interactive exercise where the audience walks through training scenarios.
You can set this up similar to a quiz and use the sets of steps earlier. Add text for the decision, include the possible picks as text or buttons, and then link each text or button to its corresponding slide.
Tip: Look at these interactive and fun AI activities for your students!
Conclusion
If you’re creating a new presentation or editing an existing one, consider these ways to better connect the content with your audience. Giving them actions to perform can increase their attention, boost their interest, and even be a fun way to learn about your topic.