
Resources
How to create a timeline in Google Slides
How to create a timeline in Google Slides using two simple methods.
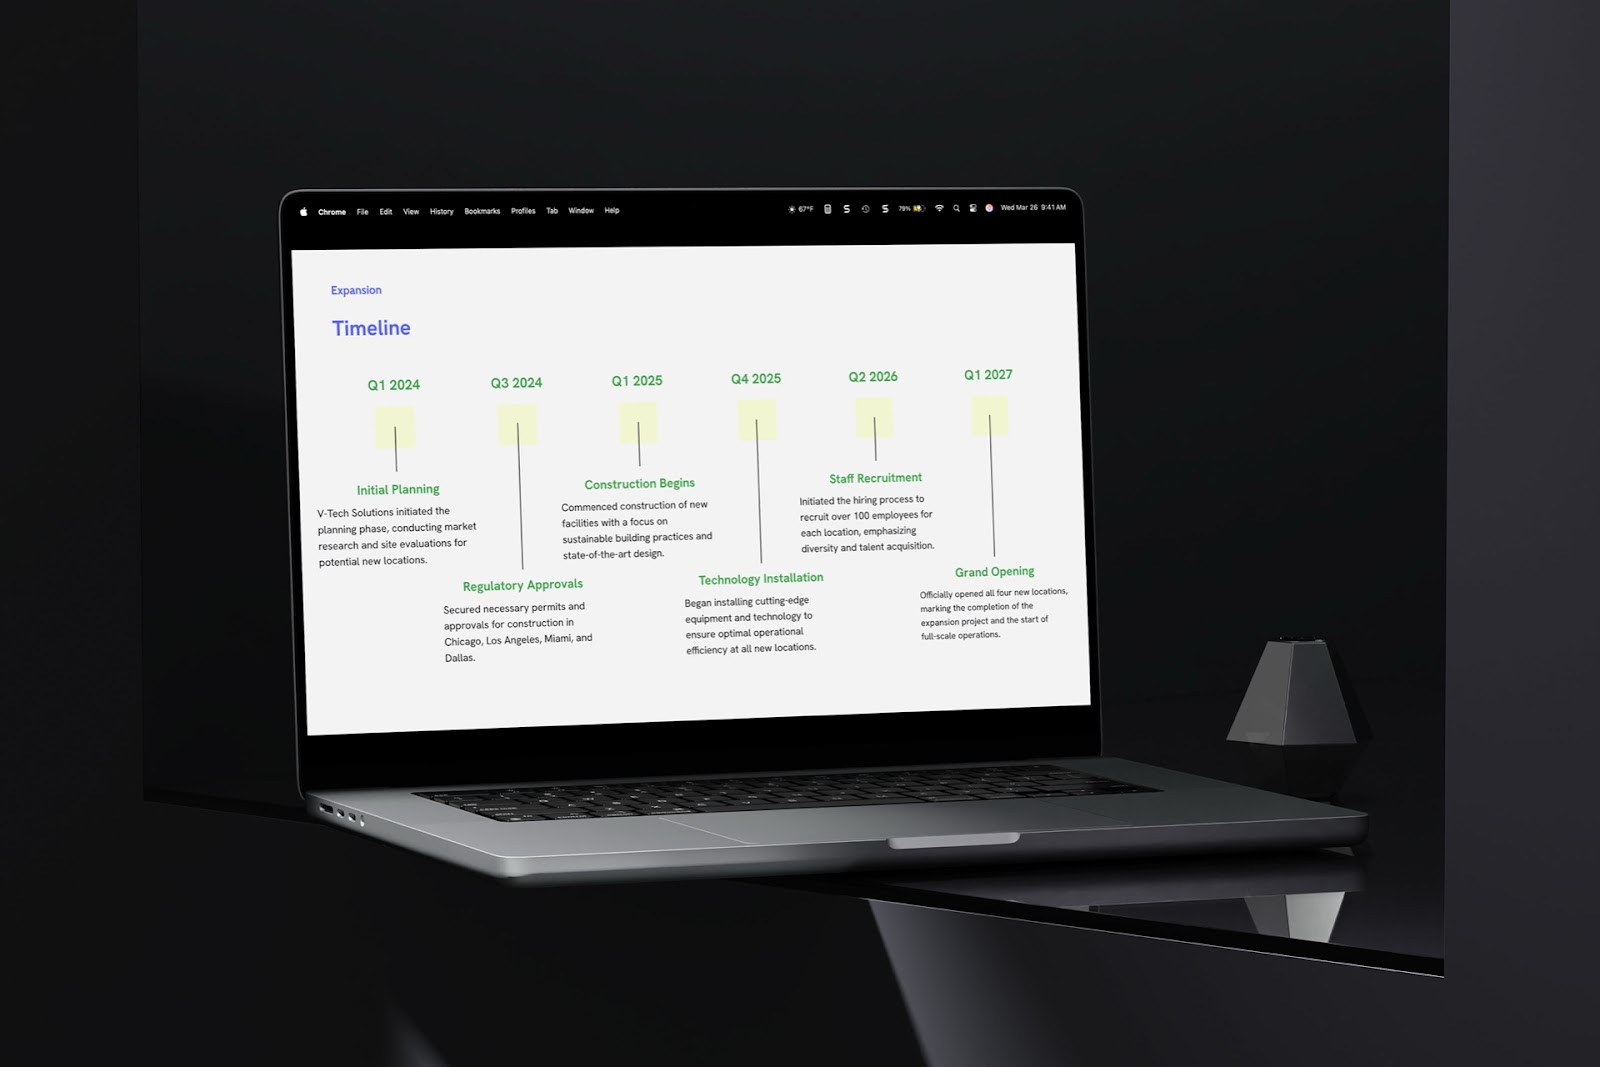
Timelines are the best way to quickly visualize a set of project milestones, a launch plan, a set of historical events, or anything else that happens in a chronological order. But what’s the best way to create a timeline in Google Slides?
Here are two ways to quickly create a timeline in Google Slides
- Use AI to make a timeline - Try using a tool like Plus AI
- Use a timeline template - Try using a Google Slides diagram
Use AI to make a timeline in Google Slides
There’s no better way to make a timeline than with an tool that fills in the details automatically.
With Plus AI, you can insert a timeline slide using a style of your choice and within a minute, have a completed timeline ready to present.
- Go to the Extensions menu and select Plus AI for Google Slides and Docs > Edit with Plus AI.
- Open the Edit with AI menu in the sidebar and pick Insert to add a new slide.
- Enter a Slide title and Description, optionally select a Template, and pick Timeline in the Layout drop-down menu.
- Choose a timeline style from the thumbnails and you’ll see the slide added to your presentation.
You’ll notice that Plus creates a populated timeline for you based on your description and presentation content. However, you can edit the dates and text if needed.
If you already have some notes on your slide, you can also try using the “Remix” feature to turn notes or content into a formatted timeline slide.
For creating and editing presentations, Plus AI is a superb option. You can use the add-in with both Google Slides and Microsoft PowerPoint, giving you flexibility that other tools don’t.
Use a diagram to make a timeline in Google Slides
If you prefer to build your timeline from scratch, you can use one of the diagrams in Google Slides. Once you choose the timeline diagram style, you simply insert the details.
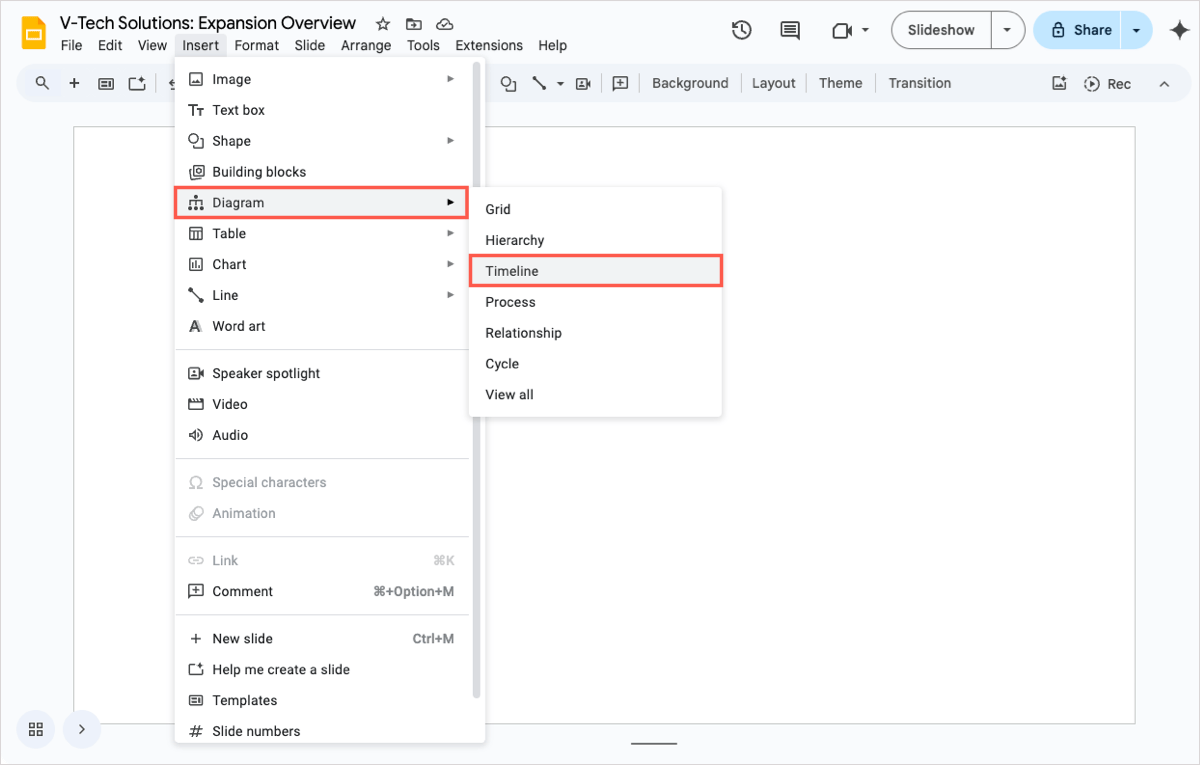
- Select a slide or insert a new one by going to either the Insert or Slide menu and picking New slide.
- Open the Insert menu, move to Diagram, and choose Timeline in the pop-out menu.
- At the top of the sidebar that displays, select the number of Dates and the Color for the timeline.
- Choose a timeline style from the thumbnails and it’ll appear on your slide.
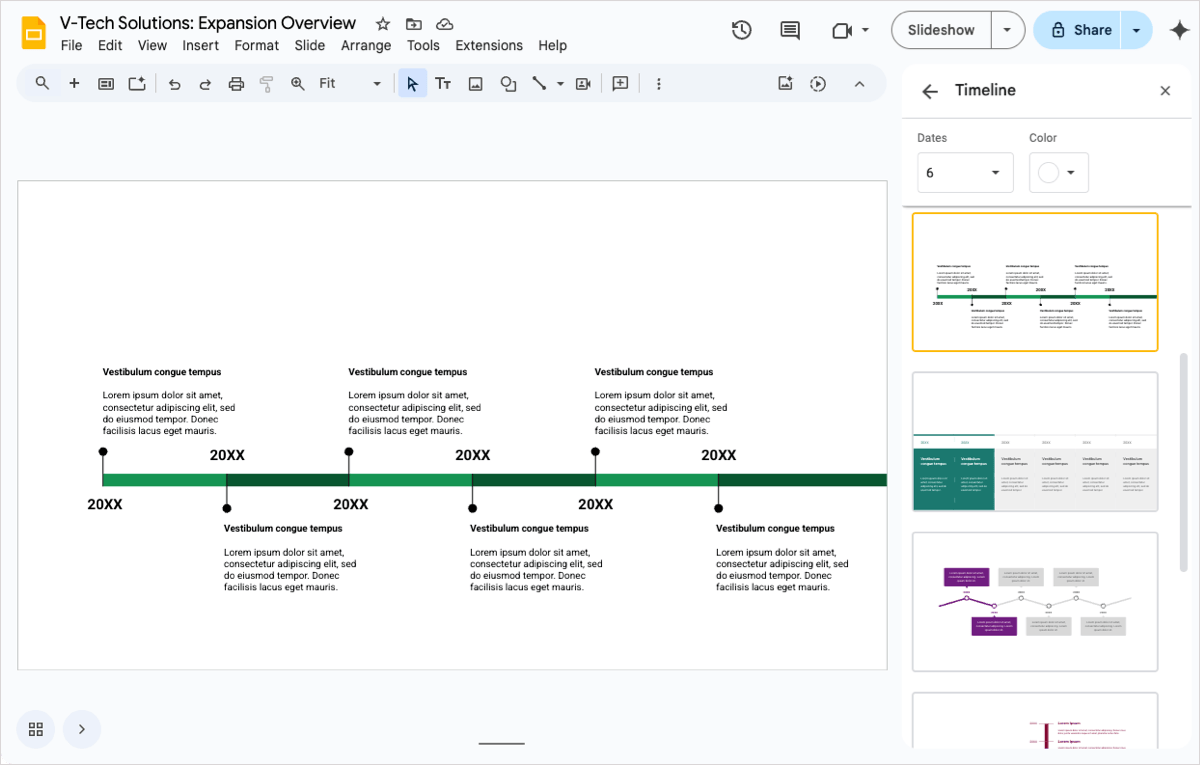
You can then replace the dates and text with your own details.
Bonus: Export your timeline slide from Google Slides
Once you create your informative and attractive timeline, you may want to use it in other applications, show it to team members, or share it with stakeholders outside of the slideshow. Luckily, this is easy to do with the Download option in Google Slides.
- Go to the timeline slide you created and open the File menu.
- Move to Download and pick an image format in the pop-out menu. You can choose from PNG, JPEG, or SVG for the current slide.
- Head to your Downloads folder or access the downloads per your web browser to obtain the timeline image.
Conclusion
You don’t have to spend hours creating a timeline for your presentation when you use Plus AI. You can rest assured that Plus will add the dates and text you need to accurately display a timeline for your slideshow.
And of course, if you have time to make the timeline from scratch and prefer to do so, you can check out the timeline diagram in Slides.
For more, look at how to prepare presentation slides that resonate with your audience and how to make Google Slides look good.
FAQs
How to make a timeline in PowerPoint?
You can use Plus AI to make a timeline in PowerPoint that’s automatically populated from the presentation content. Alternatively, you can opt for a SmartArt graphic or look for a timeline template. Learn how to do all three with our how to make a timeline in PowerPoint tutorial.
Is there a timeline template in Google Docs?
There isn’t currently a timeline template in Google Docs; however, there are a few ways to make a timeline for your document. You can use Google Drawings to create the timeline, insert a timeline from another application, or use a timeline slide image from Google Slides.
Can you put a slide timer on Google Slides?
You can add a timer in Google Slides using a Chrome extension or a timer video from a site like YouTube. Check out our how-to for inserting a timer into Google Slides for complete details on these methods.